เนื้อหาตอนต่อไปนี้จะมาดู Widget เล็กๆ ที่มีรูปแบบการใช้งาน
ง่ายๆ ที่เรียกว่า PopupMenuButton เป็นปุ่มเมนูเพิ่มเติมที่แสดงมา
ให้เราเลือกใช้งาน หรือกำหนดการทำคำสั่งที่ต้องการทำงานเพิ่มเติม
จะใช้เนื้อหาจากตอนที่แล้ว จะจัดการเฉพาะในไฟล์ article.dart
ทบทวนตอนที่แล้วได้ที่บทความ
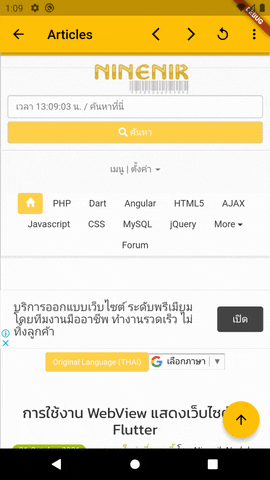
การใช้งาน WebView แสดงเว็บไซต์ ใน Flutter http://niik.in/1043
https://www.ninenik.com/content.php?arti_id=1043 via @ninenik
*เนื้อหานี้ใช้เนื้อหาต่อเนื่องจากบทความ http://niik.in/961
การใช้งาน PopupMenuButton
ตัว PopupMenuButton เมื่อกำหนดหรือเรียกใช้งาน จะแสดงเป็นปุ่มไอคอน จุด 3 จุดใน
แนวตั้งหรือชื่อไอคอนว่า Icons.more_vert เป็นการสื่อว่ามีเพิ่มเติม เมื่อเรากดที่ปุ่มนี้ก็จะแสดง
ลิสราายการปุ่มต่างๆ ให้เราเลือก ถ้าเราเลือกปุ่มรายการใดๆ ก็จะใช้ค่าปุ่มรายการนั้นๆ เป็นตัว
กำหนดเงื่อนไขการทำงานอีกที ถ้าเราไม่ต้องการเลือกรายการที่แสดง ก็สามารถกดไปที่พื้นที่ว่าง
นอกรายการเพื่อปิดปุ่มนั้นๆ ไป ในการสร้างปุ่ม PopupMenuButton จะต้องมีการกำหนด itemBuilder
เพื่อสร้างรายการของปุ่ม
รูปแบบการใช้งาน PopupMenuButton
PopupMenuButton<T>(
  onSelected: (T result) { },
  itemBuilder: (BuildContext context) => <PopupMenuEntry<T>>[
    const PopupMenuItem<T>(
      value: T.value,
      child: Text('Menu 1'),
    ),
    const PopupMenuItem<T>(
      value: T.value,
      child: Text('Menu 2'),
    ),
  ],
)
สัญลักษณ์ T คือข้อมูลประเภท Type หรือก็คือ class ดูตัวอย่าง type ในภาษา Dart
// ข้อมูล type ColorOption
enum ColorOption { red, green, blue }
// ข้อมูล type Option
class Option{
  int a = 0;
}
ทั้ง ColorOption และ Option เป็นรูปแบบหนึ่งของ class โดยตัว ColorOption จะใช้คำว่า enum เป็นคำ
keyword เป็น class พิเศษเฉพาะที่กำหนดจำนวนของค่าคงที่ ที่เรียกว่า enum type ข้อมูลที่มีการระบุแจกแจง
ค่าไว้อย่างชัดเจน ค่าของ Enum จะอ้างอิงผ่าน property ที่ชื่อ values
print(ColorOption.values); // แสดงข้อมูลของ enum type
ก็จะได้เป็น List<ColorOption> มีค่าเป็น
[ColorOption.red, ColorOption.green, ColorOption.blue]
// ColorOption.values[0] = ColorOption.red
// ColorOption.values[1] = ColorOption.green
// ColorOption.values[2] = ColorOption.blue
เราจะใช้ช้อมูล Enum type สำหรับกำหนดรายการให้กับ PopupMenuButton ยกตัวอย่างเช่นข้อมูล
enum ColorOption { red, green, blue }
สามารถกำหนดใช้งานใน PopupMenuButton เป็นดังนี้
PopupMenuButton<ColorOption>(
  onSelected: (ColorOption result) { },
  itemBuilder: (BuildContext context) => <PopupMenuEntry<ColorOption>>[
    const PopupMenuItem<ColorOption>(
      value: ColorOption.red,
      child: Text('Menu 1 Red'),
    ),
    const PopupMenuItem<ColorOption>(
      value: ColorOption.green,
      child: Text('Menu 2 Green'),
    ),
    const PopupMenuItem<ColorOption>(
      value: ColorOption.blue,
      child: Text('Menu 3 Blue'),
    ),
  ],
)
หรือกรณีเราใช้เป็นข้อมูล String type ก็จะเป็นประมาณนี้
PopupMenuButton<String>(
  onSelected: (String result) { },
  itemBuilder: (BuildContext context) => <PopupMenuEntry<String>>[
    const PopupMenuItem<String>(
      value: '1',
      child: Text('Menu 1 Red'),
    ),
    const PopupMenuItem<String>(
      value: '2',
      child: Text('Menu 2 Green'),
    ),
    const PopupMenuItem<String>(
      value: '3',
      child: Text('Menu 3 Blue'),
    ),
  ],
)
หรือกรณีเราใช้เป็นข้อมูล boolean type ก็จะเป็นประมาณนี้
PopupMenuButton<bool>(
  onSelected: (bool result) { },
  itemBuilder: (BuildContext context) => <PopupMenuEntry<bool>>[
    const PopupMenuItem<bool>(
      value: true,
      child: Text('Menu 1 Red'),
    ),
    const PopupMenuItem<bool>(
      value: false,
      child: Text('Menu 2 Green'),
    ),
  ],
)
เราสามารถสร้างลิสรายการจากข้อมูลอาเรย์หรือ List ได้ง่ายเพื่อลดขึ้นตอนการกำหนดแต่ละรายการ
// สร้างตัวแปร ลืสรายการเมนูที่เป็น String
var myMenuItems = <String>[
  'Home',
  'Profile',
  'Setting',
];
จากนั้นทำการวนลูปแสดงใน PopupMenuItem ดังนี้
PopupMenuButton<String>(
  onSelected: (String result) { },
  itemBuilder: (BuildContext context) {
    return myMenuItems.map((String choice) {
      return PopupMenuItem<String>(
        child: Text(choice),
        value: choice,
      );
    }).toList();
  }
)
ผลลัพธ์ที่ได้

กรณีประยุกต์กับ Map Type เพิ่ม FontAwesome ไอคอนเข้าไป
// สร้างตัวแปร ลืสรายการเมนูที่เป็น Map<dynamic, dynamic>
var myMenuItems = <Map>[
  {'icon':FontAwesomeIcons.home,'value':'home','label':'Home'},
  {'icon':FontAwesomeIcons.userAlt,'value':'profile','label':'Profile'},
  {'icon':FontAwesomeIcons.cog,'value':'setting','label':'Setting'}
];
จากนั้นทำการวนลูปแสดงใน PopupMenuItem ดังนี้
PopupMenuButton<Map>(
  onSelected: (Map result) { },
  itemBuilder: (BuildContext context) {
    return myMenuItems.map((Map choice) {
      return PopupMenuItem<Map>(
        child: ListTile(
          leading: Icon(choice['icon']),
          title: Text(choice['label'], style: Theme.of(context).textTheme.bodyText1),
        ),
        value: choice,
      );
    }).toList();
  }
)
ผลลัพธ์ที่ได้

ตอนนี้เราได้รู้จักแนวทางการประยุกต์การสร้างลิสรายการในรูปแบบต่างๆ ให้สังเกตให้ค่า value ของ
PopupMenuItem คือเมื่อเราแตะเลือกที่รายการใด ค่า value นี้จะถูกส่งเข้าไปใน callback ฟังก์ชั่นของ
onSelected ดังนั้นในการกำหนดเงื่อนไขการทำงาน ก็จะไปกำหนดในค่าที่เลือกว่าเป็นค่าใด และให้ทำงาน
อย่างเรา ยกตัวอย่างรูปแบบกรณีล่าสุด ก็จะเป็น
PopupMenuButton<Map>(
  onSelected: (Map result) {
    result = Map<String, dynamic>.from(result); // แปลงค่ากลับ
    switch (result['value']) { // ตรวจสอบค่าที่จะใช้งานเป็นเงื่อนไข
      case 'home':
        print('Home clicked');
        break;
      case 'profile':
        print('Profile clicked');
        break;
      case 'setting':
        print('Setting clicked');
        break;
    }
  },
  itemBuilder: (BuildContext context) {
    return myMenuItems.map((Map choice) {
      return PopupMenuItem<Map>(
        child: ListTile(
          leading: Icon(choice['icon']),
          title: Text(choice['label'], style: Theme.of(context).textTheme.bodyText1),
        ),
        value: choice,
      );
    }).toList();
  }
)
เนื่องจากค่าจาก Map type เป็นข้อมูลที่มีความซับซ้อนดังนั้น จึงมีการแปลงกลับมาในรูปแบบที่สามารถ
อ้างอิงการใช้งานได้ก่อน แต่ถ้าเป็นค่าอื่นๆ เช่น boolean Sring Int Enum เหล่านี้ สามารถนำค่าไปตรวจ
สอบเป็นเงื่อนไขได้เลย
ในตัวอย่างการทำคำสั่งเมื่อเข้าเงื่อนไข จะใช้เป็นการเรียกใช้ฟังก์ชั่นอีกที เพราะถ้าเขียนการทำงานในนี้
ก็จะยาวเกินไป ข้างต้นเราแค่ทดสอบแสดงข้อความเท่านั้น
ไฟล์ article.dart แบบเต็ม
import 'dart:async';
import 'dart:io';

import 'package:flutter/material.dart';
import 'package:webview_flutter/webview_flutter.dart';

class Articles extends StatefulWidget {
    static const routeName = '/articles';

    const Articles({Key? key}) : super(key: key);

    @override
    State<StatefulWidget> createState() {
        return _ArticlesState();
    }
}

class _ArticlesState extends State<Articles> {
    // กำหนดตัวแปร controler สำหรับควบคุมการทำงาน
    final Completer<WebViewController> _controller =
        Completer<WebViewController>();

    @override
    void initState() {
      super.initState();
      // กำหนดการใช้งาน ที่รับการใช้งาน keyboard สำหรับ android
      if (Platform.isAndroid) WebView.platform = SurfaceAndroidWebView();
    }

    @override
    Widget build(BuildContext context) {
        // รับค่า url ที่ส่งมาใน arguments
        final url = ModalRoute.of(context)!.settings.arguments as String;

        return Scaffold(
            appBar: AppBar(
                title: Text('Articles'),
                actions: <Widget>[ // สร้างอาเรย์หรือ List ของปุ่มใน action
                  NavigationControls(_controller.future),
                  SampleMenu(_controller.future),
                ],
            ),
            body: Builder(builder: (BuildContext context) {
              // ใช้งาน WebView กำหนดค่าเบื้องต้น
              return WebView(
                initialUrl: url, // ใช้ url จากหน้าที่ส่งมา
                javascriptMode: JavascriptMode.unrestricted, // ใช้งาน JavaScript ได้
                onWebViewCreated: (WebViewController webViewController) { // เมื่อสร้าง webviewเสร็จ
                  _controller.complete(webViewController); // การใช้งาน async เมื่อ controller พร้อมใช้งาน
                },
                javascriptChannels: <JavascriptChannel>{ // กำหนดการใช้งาน javascriptChannels
                  _toasterJavascriptChannel(context),
                },
                gestureNavigationEnabled: true, // กำหนดให้รองรับ gusture ต่างๆ เช่นการปัด เพื่อเลื่อนไปหน้าต่างอื่น
              );
            }),
            floatingActionButton: scrollTopButton(),
        );
    }

    // สร้าง JavascriptChannel สำหรับรับค่าข้อมูลที่ส่งผ่านทาง JavaScript
    JavascriptChannel _toasterJavascriptChannel(BuildContext context) {
      return JavascriptChannel(
        name: 'Toaster', // กำหนดชื่อที่จะใช้
        onMessageReceived: (JavascriptMessage message) {
          // ในที่นี้เมื่อได้ค่ามาแล้ว จะแสดงข้อความด้วย SnackBar
          ScaffoldMessenger.of(context).showSnackBar(
            SnackBar(content: Text(message.message)),
          );
      });
    }

    // สร้างฟังก์ชั่น คืนค่าเป็น widget
    Widget scrollTopButton() {
      return FutureBuilder<WebViewController>(
          future: _controller.future, // ใช้งาน controller future ได้เลย
          builder: (BuildContext context,
              AsyncSnapshot<WebViewController> controller) {
            if (controller.hasData) { // มีข้อมูล
              return FloatingActionButton( // คืนค่าเป็นปุ่มลูกศรเลื่อนบน
                onPressed: () async { // ถ้ากด
                  // เรียกคำสั่ง javascript  เลื่อน scroll ไปด้านบนสุด
                  await controller.data!.evaluateJavascript('window.scrollTo(0, 0);');
                },
                child: const Icon(Icons.arrow_upward),
              );
            }
            return Container(); // ยังไม่มีข้อมูล คืนค่า container ว่างไปแสดงที่ปุ่ม
          });
    }

}

// กำหนด Enum Type สำหรับเป็นลิสรายการของ PopupMenuButton
enum MenuOptions {
  showUserAgent,
  listCookies,
  clearCookies,
  addToCache,
  listCache,
  clearCache,
}

// สร้าง widget สำหรับทำปุ่มควบคุม เพิ่มเติมแบบ PopupMenuButton
class SampleMenu extends StatelessWidget {
  SampleMenu(this.controller);

  final Future<WebViewController> controller; // ใช้งาน WebViewController
  final CookieManager cookieManager = CookieManager(); // ใช้งาน CookieManager

  @override
  Widget build(BuildContext context) {
    return FutureBuilder<WebViewController>(
      future: controller,
      builder:
          (BuildContext context, AsyncSnapshot<WebViewController> controller) {
        return PopupMenuButton<MenuOptions>(
          onSelected: (MenuOptions value) {
            switch (value) { // ใช้เงื่อนไขค่าที่เลือก ทำฟังก์ชั่นที่ต้องการ
              case MenuOptions.showUserAgent:
                _onShowUserAgent(controller.data!, context);
                break;
              case MenuOptions.listCookies:
                _onListCookies(controller.data!, context);
                break;
              case MenuOptions.clearCookies:
                _onClearCookies(context);
                break;
              case MenuOptions.addToCache:
                _onAddToCache(controller.data!, context);
                break;
              case MenuOptions.listCache:
                _onListCache(controller.data!, context);
                break;
              case MenuOptions.clearCache:
                _onClearCache(controller.data!, context);
                break;
            }
          },
          itemBuilder: (BuildContext context) => <PopupMenuItem<MenuOptions>>[
            PopupMenuItem<MenuOptions>(
              value: MenuOptions.showUserAgent,
              child: const Text('Show user agent'),
              enabled: controller.hasData,
            ),
            const PopupMenuItem<MenuOptions>(
              value: MenuOptions.listCookies,
              child: Text('List cookies'),
            ),
            const PopupMenuItem<MenuOptions>(
              value: MenuOptions.clearCookies,
              child: Text('Clear cookies'),
            ),
            const PopupMenuItem<MenuOptions>(
              value: MenuOptions.addToCache,
              child: Text('Add to cache'),
            ),
            const PopupMenuItem<MenuOptions>(
              value: MenuOptions.listCache,
              child: Text('List cache'),
            ),
            const PopupMenuItem<MenuOptions>(
              value: MenuOptions.clearCache,
              child: Text('Clear cache'),
            ),
          ],
        );
      },
    );
  }

  // ส่วนของฟังก์ชั่นการทำงานต่างๆ

  // ฟังก์ชั่นแสดง UserAgent ของ WebView
  void _onShowUserAgent(
      WebViewController controller, BuildContext context) async {
    await controller.evaluateJavascript(
        'Toaster.postMessage("User Agent: " + navigator.userAgent);');
  }

  // ฟังก์ชั่นแสดงรายการ cookie
  void _onListCookies(
      WebViewController controller, BuildContext context) async {
    final String cookies =
        await controller.evaluateJavascript('document.cookie');
    ScaffoldMessenger.of(context).showSnackBar(SnackBar(
      content: Column(
        mainAxisAlignment: MainAxisAlignment.end,
        mainAxisSize: MainAxisSize.min,
        children: <Widget>[
          const Text('Cookies:'),
          _getCookieList(cookies),
        ],
      ),
    ));
  }

  // ฟังก์ชั่นเพิ่มรายการ cache
  void _onAddToCache(WebViewController controller, BuildContext context) async {
    await controller.evaluateJavascript(
        'caches.open("test_caches_entry"); localStorage["test_localStorage"] = "dummy_entry";');
    ScaffoldMessenger.of(context).showSnackBar(const SnackBar(
      content: Text('Added a test entry to cache.'),
    ));
  }

  // ฟังก์ชั่นแสดงรายการ cache
  void _onListCache(WebViewController controller, BuildContext context) async {
    await controller.evaluateJavascript('caches.keys()'
        '.then((cacheKeys) => JSON.stringify({"cacheKeys" : cacheKeys, "localStorage" : localStorage}))'
        '.then((caches) => Toaster.postMessage(caches))');
  }

  // ฟังก์ชั่นล้างค่า cache
  void _onClearCache(WebViewController controller, BuildContext context) async {
    await controller.clearCache();
    ScaffoldMessenger.of(context).showSnackBar(const SnackBar(
      content: Text("Cache cleared."),
    ));
  }

  // ฟังก์ชั่นล้างค่า cookie
  void _onClearCookies(BuildContext context) async {
    final bool hadCookies = await cookieManager.clearCookies();
    String message = 'There were cookies. Now, they are gone!';
    if (!hadCookies) {
      message = 'There are no cookies.';
    }
    ScaffoldMessenger.of(context).showSnackBar(SnackBar(
      content: Text(message),
    ));
  }

  // ฟังก์ชั่นแสดงรายการ cookie
  Widget _getCookieList(String cookies) {
    if (cookies == null || cookies == '""') {
      return Container();
    }
    final List<String> cookieList = cookies.split(';');
    final Iterable<Text> cookieWidgets =
        cookieList.map((String cookie) => Text(cookie));
    return Column(
      mainAxisAlignment: MainAxisAlignment.end,
      mainAxisSize: MainAxisSize.min,
      children: cookieWidgets.toList(),
    );
  }
}


// สร้าง widget สำหรับทำปุ่มควบคุม เช่น ก่อนหน้า ย้อนหลัง รีเฟรช
class NavigationControls extends StatelessWidget {
  // รับค่าข้อมูล Future WebViewController ผ่าน parameter เข้ามาใช้งาน
  const NavigationControls(this._webViewControllerFuture);

  // กำหนดตัวแปรสำหรับรับค่าและเรียกใช้งาน WebViewController ใน widget นี้
  final Future<WebViewController> _webViewControllerFuture;

  @override
  Widget build(BuildContext context) {
    return FutureBuilder<WebViewController>( // ดูเพิ่มเติมได้ที่ http://niik.in/1036
      future: _webViewControllerFuture,
      builder: (BuildContext context, AsyncSnapshot<WebViewController> snapshot) {
        // กำหนดตัวแปรเงื่อนไข controller พร้อมทำงานหรือ webview พร้อมทำงาน
        final bool webViewReady =
        snapshot.connectionState == ConnectionState.done;
        // กำนหดตัวแปร controller เพื่อควบคุม webview
        final WebViewController? controller = snapshot.data;
        // สร้าง widget ปุมต่างๆ ไปใช้งาน
        return Row(
          children: <Widget>[
            IconButton(
              icon: const Icon(Icons.arrow_back_ios),
              onPressed: !webViewReady // ไม่พร้อมทำงาน
                  ? null // คืนค่า null
                  : () async { // พร้อมทำงาน
                      if (await controller!.canGoBack()) { //เช็คย้อนหลังได้ไหม
                        await controller.goBack(); // ถ้าได้ ก็ย้อนหลัง
                      } else {
                        // ย้อนหลังไม่ได้ แสดงข้อความแจ้ง
                        ScaffoldMessenger.of(context).showSnackBar(
                          const SnackBar(content: Text("No back history item")),
                        );
                        return;
                      }
                    },
            ),
            IconButton(
              icon: const Icon(Icons.arrow_forward_ios),
              onPressed: !webViewReady // ไม่พร้อมทำงาน
                  ? null // คืนค่า null
                  : () async { // พร้อมทำงาน
                      if (await controller!.canGoForward()) { // เช็คไปหน้าได้ไหม
                        await controller.goForward(); // ถ้าได้ ก็ไปหน้าถัดไป
                      } else {
                        // ถ้าไปหน้าไม่ได้ แสดงข้อความแจ้ง
                        ScaffoldMessenger.of(context).showSnackBar(
                          const SnackBar(
                              content: Text("No forward history item")),
                        );
                        return;
                      }
                    },
            ),
            IconButton(
              icon: const Icon(Icons.replay),
              onPressed: !webViewReady // ไม่พร้อมทำงาน
                  ? null // คืนค่า null
                  : () { // พร้อมทำงาน
                      controller!.reload(); // โหลดหน้าเว็บเพจใหม่อีกครั้ง
                    },
            ),
          ],
        );
      },
    );
  }
}
ผลลัพธ์ที่ได้
เนื้อหานี้จะเน้นไปที่การใช้งาน PopupMenuButton รายละเอียดโค้ดอื่นๆ ที่เสริมเข้ามามีรูปแบบ
การใช้งานเหมือนบทความตอนที่แล้ว คำอธิบายแสดงในโค้ด
หวังว่าเนื้อหานี้จะทำให้เราสามารถประยุกต์การใช้งาน PopupMenuButton เพื่อกำหนดคำสั่งเพิ่ม
เติมที่ต้องการได้ เนื้อหาตอนหน้าจะเป็นอะไร รอติดตาม

 อ่านต่อที่บทความ
 เนื้อหาที่เกี่ยวข้อง