
เนื้อหานี้เราจะมาดูแนวทางการดึงข้อมูลจาก server มาแสดงใน app ionic material
โดยลักษณะจะคล้ายกับเนื้อหาเก่า ที่เกี่ยวกับการใช้งาน ionicframework จากบทความ
ionicframework โหลดข้อมูล จากเว็บไซต์ มาแสดง แบบ cards ตอนที่ 3
https://www.ninenik.com/content.php?arti_id=526 via @ninenik
จะไม่ต่างกันมากนัก หลักการทำงานก็คือ เราจะแสดงบทความ สมมติ
บทความจากเว็บไซต์ www.ninenik.com โดยในที่นี้จะแสดงแค่ 10 รายการในลักษณะ
เป็นการ random และใช้วิธีการส่งข้อมูลจาก server มาในรูปแบบไฟล์ json ใช้งาน
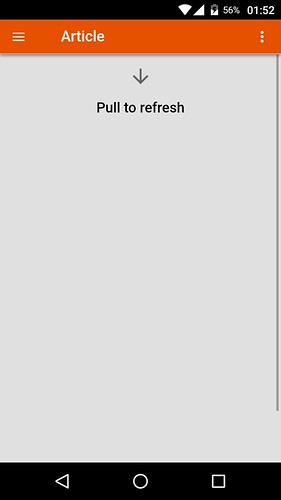
ผ่านคำสั่ง $http.jsonp ใน ionic และให้สามารถรีเฟรส หรือโหลดเนื้อหามาใหม่
โดยการ กดค้างในเนื้อหาใน app ดึงลงแล้วปล่อย ดังรูปด้านล่าง
สำหรับเนื้อหาในตอนนี้ เราจะแจกไฟล์ตัวอย่างของ ionic material ที่ปรับแต่งหน้าตา
เล็กน้อย และตัดส่วนของ map กับระบบล็อกอินผ่าน server ออก แต่ยังคงระบบล็อกอิน
ผ่าน database โดยใช้ SQLite อยุ่ ดาวน์โหลดไฟล์ สำหรับทดสอบได้ที่
ดาวน์โหลดไฟลเดอร์ www สำหรับทดสอบได้ที่ https://goo.gl/Ngy5VL
สำหรับ plugin เพิ่มเติมที่ต้องใช้ดูได้ที่บทความ
ประยุกต์ใช้งาน ระบบสมาชิกใน app ionic material ร่วมกับ SQLite
เริ่มต้นการทดสอบการดึงข้อมูลจากฝั่ง server มาแสดงใน app
1. สร้างไฟล์ article_api.php สำหรับแสดง json string ที่จะใช้งาน
ในที่นี้เราจะทดสอบโดยแสดงคำสั่งการดึงข้อมูลบทความจาก www.ninenik.com
ให้ดูเป็นแนวทาง
<?php
header("Content-type:application/json; charset=UTF-8");
header("Cache-Control: no-store, no-cache, must-revalidate");
header("Cache-Control: post-check=0, pre-check=0", false);
if(isset($_SERVER['HTTP_ORIGIN'])) {
header("Access-Control-Allow-Origin: {$_SERVER['HTTP_ORIGIN']}");
header('Access-Control-Allow-Credentials: true');
 //       header('Access-Control-Max-Age: 86400');    // cache for 1 day
}
// Access-Control headers are received during OPTIONS requests
if($_SERVER['REQUEST_METHOD'] == 'OPTIONS') {
if(isset($_SERVER['HTTP_ACCESS_CONTROL_REQUEST_METHOD']))
header("Access-Control-Allow-Methods: GET, POST, OPTIONS");
if(isset($_SERVER['HTTP_ACCESS_CONTROL_REQUEST_HEADERS']))
header("Access-Control-Allow-Headers: {$_SERVER['HTTP_ACCESS_CONTROL_REQUEST_HEADERS']}");
exit(0);
}
// ส่วนการกำหนด header ให้กำหนดตามด้านบน ไม่เช่นนั้น app จะไม่สามารถส่งค่ามาได้
require_once("dbconnect.php");

$sql = "
SELECT * FROM tbl_article ORDER BY RAND() LIMIT 0,10
";
$result = $mysqli->query($sql);
if($result && $result->num_rows>0){
	while($row = $result->fetch_assoc()){
		$json_data[]=array(
			"id"=>$row['arti_id'],
			"topic"=>$row['arti_topic'],
			"description"=>strip_tags(trim($row['arti_detail']),0,200),
			"date"=>date("Y-m-d",$row['adddate']),
			"img"=>"https://www.ninenik.com/images/day-".strtolower(date("D",$row['adddate'])).".jpg",
			"url"=>"https://www.ninenik.com/content.php?arti_id=".$row['arti_id'],
			"view"=>$row['hit'],
			"lastvisited"=>$row['lastvisited'],
		);
	}
}
// แปลง array เป็นรูปแบบ json string
if(isset($json_data)){
	$json= json_encode($json_data);
	if(isset($_GET['callback']) && $_GET['callback']!=""){
	echo $_GET['callback']."(".$json.");";
	}else{
	echo $json;
	}
}
?>
สังเกตว่าหากเราต้องการค่าอะไรบ้างไปแสดง ให้กำหนดเพิ่มฟิลด์ข้อมูลได้ตามต้องการ
ในตัวอย่างโค้ดด้านบนคือให้ไปดึงรายการบทความแบบ random มาแสดงครั้งละ 10 รายการ
2. สร้าง service สำหรับดึงข้อมูลจากฝั่ง server
ให้เปิดไฟล์ services.js ในโฟลเดอร์ js และปรับโค้ดให้เป็นดังนี้
'use strict';
angular.module('starter.services', [])
.service('ArticleService',function($http, $q) { // สร้าง service
    // url ไฟล์ json
    var url="https://www.ninenik.com/demo/article_api.php?callback=JSON_CALLBACK";
    return { // ในที่นี้เราจะใช้การส่งค่าแบบ post ทั้งสามฟังก์ชั่น
        getArticle: function() {
            var deferred = $q.defer();
            $http.jsonp(url)
                .success(deferred.resolve)
                .error(deferred.reject);
            return deferred.promise;
        }
    };
})
.service('ShareService',function(){

});
เราได้เพิ่ม ArticleService โดยกำหนดฟังก์ชั่น getArticle ใช้ $http.jsonp ดึงข้อมูล
จากฝั่ง server ตาม url ที่กำหนด
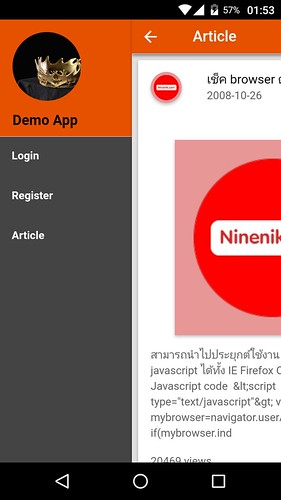
3. เพิ่มเมนู Article เข้าไปในไฟล์ menu.html
เปิดไฟล์ menu.html ในโฟลเดอร์ templates
แล้วเพิ่มเมนู article โดยเราจะให้ลิ้งค์ไปที่ state app.article
<ion-side-menus enable-menu-with-back-views="true">
    <ion-side-menu-content>
        <ion-nav-bar class="bar-energized-900" ng-class="{expanded: isExpanded, 'has-header-fab-left': hasHeaderFabLeft, 'has-header-fab-right': hasHeaderFabRight}" align-title="left">
            <!--<ion-nav-back-button class="no-text">-->
            <!--</ion-nav-back-button>-->
            <ion-nav-buttons side="left">
                <button class="button button-icon button-clear ion-navicon" menu-toggle="left">
                </button>
            </ion-nav-buttons>
        </ion-nav-bar>
        <ion-nav-view name="fabContent"></ion-nav-view>
        <ion-nav-view name="menuContent" ng-class="{expanded: isExpanded}" ></ion-nav-view>
    </ion-side-menu-content>
    <ion-side-menu side="left">
        <ion-header-bar class="bar expanded energized-900-bg">
            <span class="avatar" style="background: url('img/crown.jpg'); background-size: cover;"></span>
            <h2>Demo App</h2>
        </ion-header-bar>
        <ion-content class="dark-bg light has-expanded-header">
            <ion-list>
                <ion-item ng-show="!showMemberMenu" nav-clear menu-close ui-sref="app.login">
                    Login
                </ion-item>
                <ion-item ng-show="!showMemberMenu" nav-clear menu-close ui-sref="app.register">
                    Register
                </ion-item>
                <ion-item ng-show="!showMemberMenu" nav-clear menu-close ui-sref="app.article">
                    Article
                </ion-item>
                <ion-item ng-show="showMemberMenu" nav-clear menu-close ui-sref="app.profile">
                    Profile
                </ion-item>
                <ion-item ng-show="showMemberMenu" nav-clear menu-close ui-sref="app.listpage">
                    List Page
                </ion-item>
                <ion-item ng-click="logoutMember()" ng-show="showMemberMenu" nav-clear menu-close >
                    Logout
                </ion-item>
            </ion-list>
        </ion-content>
    </ion-side-menu>
</ion-side-menus>
4. สร้าง routing กำหนด state ของ article
ให้เปิดไฟล์ app.js ในโฟลเดอร์ js เพิ่ม article state เข้าไปดังโค้ด
    .state('app.article', {// กำหนด state
        url: '/article',  // กำหนดตำแหน่งหน้า app คล้ายๆ url ในเว็บ
        views: {
            'menuContent': { // ส่วนของการแสดงใน view ชื่อ menuContent
                templateUrl: 'templates/article.html', // ใช้ template ชื่อ article.html
                controller: 'ArticleCtrl'// กำหนดชื่อ controller ที่จะใช้งาน
            },
            'fabContent': { // ส่วนของการแสดงใน view ชื่อ fabContent ไม่ได้กำหนดอะไร
                template: ''
            }
        }
    })
ในไฟล์ตัวอย่างมีโค้ดแบบเต็มอยู่แล้ว ให้ดูวิธีการตามเป็นแนวทาง
ใน การกำหนด routing เรามีการชื่อ state มีการกำหนดไฟล์ template และ
มีการกำหนดชื่อ controller สำหรับใช้ควบคุมการทำงาน
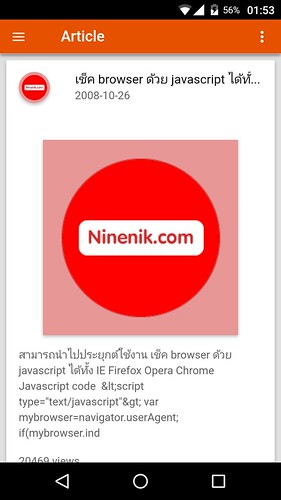
5. สร้างไฟล์ article.html สำหรับแสดงรายการ
ให้ทำการสร้างไฟล์ article.html ในโฟลเดอร์ templates โดยไฟล์นี้
จะเป็นการกำหนดรูปแบบหน้า article เราจะใช้รูปแบบ card ของ ionic การแสดง
ผลเราสามารถใช้ css จัดรูปแบบเพิ่มเติมได้ ในที่นี้จะไม่ได้เพิ่มหรือจัดรูปแบบมากนัก
<ion-view view-title="Article">
    <ion-nav-buttons side="right">
        <div class="buttons buttons-right header-item">
    <span class="right-buttons">
    <button class="button button-icon button-clear ion-android-more-vertical"> </button>
    </span>
        </div>
    </ion-nav-buttons>
    <ion-content class="stable-bg" ng-class="{expanded:isExpanded}">
        <ion-refresher on-refresh="refresh()"></ion-refresher>
        <div ng-show="!articles.length">
            <div style="text-align: center;">
                <h4>Pull to refresh</h4>
            </div>
        </div>
        <div class="list card light-bg" ng-repeat="article in articles">
            <div class="item item-avatar">
                <img ng-src="{{article.img}}">
                <h2>{{article.topic}}</h2>
                <p>{{article.date}}</p>
            </div>

            <div class="item item-body">
                <img ng-src="{{article.img}}" alt="" style="margin: auto;">
                <p>
                    {{article.description}}
                </p>
                <p>{{article.view}} views</p>

            </div>
        </div>


    </ion-content>
</ion-view>
6. กำหนดการทำงานใน controller ให้กับหน้า article
ให้เปิดไฟล์ controllers.js ในโฟลเดอร์ js และเพิ่ม controller ไปดังนี้
.controller('ArticleCtrl', function(
    $scope, $stateParams, $timeout, ionicMaterialInk, ionicMaterialMotion
    ,$ionicPlatform, ArticleService) {
    $scope.$parent.showHeader();
    $scope.$parent.clearFabs();
    $scope.$parent.setHeaderFab(false);
    $scope.$parent.hasShadow();

    $timeout(function() {
        $scope.isExpanded = false;
        $scope.$parent.setExpanded(false);
    }, 300);

    // กำหนดตัวแปร สำหรับไว้รับค่าข้อมูลบทความ
    $scope.articles = [];

     // สร้างฟังก์ชั่นสำหรับไปดึงข้อมูลจาก server
    $scope.refresh = function(){
        // เรียกใช้ ArticleService ให้ทำงานฟังก์ชั่น getArticle
        ArticleService.getArticle()
            .then(function(response) {
                console.log(response);
                // นำผลลัพธ์ที่ได้เก็บในตัวแปร $scope.articles
                $scope.articles = response;
                // ซ่อนหลังจาก ข้อมูลแสดงแล้ว
                $scope.$broadcast("scroll.refreshComplete");
            });
    };


    ionicMaterialMotion.fadeSlideInRight();

    ionicMaterialInk.displayEffect();

})
ไฟล์โค้ด controller ทั้งหมดอยู่ในไฟล์ตัวอย่างที่ดาวน์โหลด
สังเกตว่าใน ArticleCtrl มีการเรียกใช้ ArtcleService ที่เราสร้างในไฟล์ services.js
7. ทำการ build apk ไฟล์แล้วนำไปทดสอบติดตั้งบนมือถือ
ด้วยคำสั่ง
C:\phonegap\learn003>phonegap build android
ให้ทำการทดสอบติดตั้งในมือถือ android ของเรา จะได้หน้าตา app ประมาณนี้

 เนื้อหาที่เกี่ยวข้อง