สำหรับเนื้อหาตอนนี้ จะขอเพิ่มเติมในส่วนของการสร้างหน้าเพิ่มเข้าไป
ใน app ของเราใน ionic material โดยจะเป็นในลักษณะการเพิ่มหน้า app
ซ่อนเข้าไปอีกที อย่างตัวอย่างก่อนหน้าเรื่องการแสดงแผนที่ใน app
เราได้รู้วิธีการเพิ่มหน้าสำหรับการแสดงแผนที่เข้าไป จากบทความ
ionic material การแสดงแผนที่ google map ใน app
https://www.ninenik.com/content.php?arti_id=730 via @ninenik
ซึ่งแนวทางก็จะคล้ายๆ กัน แต่จะมีปรับแต่งในส่วนของเมนูเข้าไป เช่น ถ้าเข้าไปในหน้า
ที่เป็นหน้าย่อยของหน้าหลักอีกที ไอคอนเมนูก็จะใช้เป็บปุ่ม back แทน
รวมทั้งจะแสดงแนวทางการวางรูปแบบหน้าที่เพิ่มเข้ามาเป็นตัวอย่าง layout อย่างง่าย
5 ตัวอย่าง ดังนี้
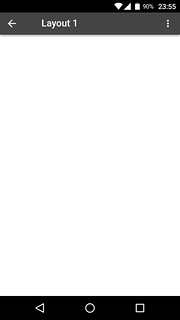
layout1 - มีปุ่มย้อนกลับ แท็บ header แถวเดียว ไม่มีปุ่ม fab
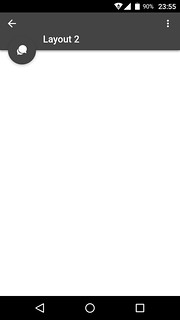
layout2 - มีปุ่มย้อนกลับ แท็บ header แสดงขยาย มีปุ่ม fab แสดงตำแหน่งบนขวา
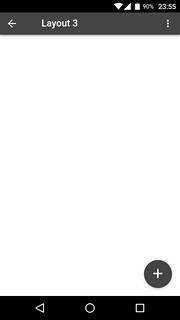
layout3 - มีปุ่มย้อนกลับ แท็บ header แถวเดียว มีปุ่ม fab แสดงตำแหน่งล่างขวา
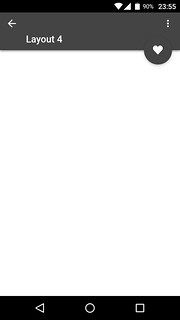
layout4 - มีปุ่มย้อนกลับ แท็บ header แสดงขยาย มีปุ่ม fab แสดงตำแหน่งบนขวา
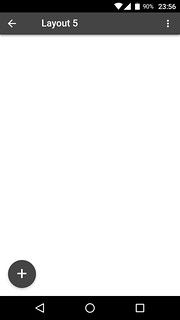
layout5 - มีปุ่มย้อนกลับ แท็บ header แถวเดียว มีปุ่ม fab แสดงตำแหน่งล่างซ้าย
ตัวอย่างตามรูป ตามลำดับ
หากต้องการทำความเข้าใจเพิ่มเติมเกี่ยวกับ controller ในส่วนการแสดง header แบบขยาย
และการแสดงปุ่ม fab สามารถอ่านเพิ่มเติมได้ที่บทความ
ionic material ศึกษาจาก demo การทำงานของ controller ตอนที่ 3
https://www.ninenik.com/content.php?arti_id=699 via @ninenik
ลำดับวิธีการที่จะใช้เป็นแนวทางแนะนำการเพิ่มหน้า app ย่อย เป็นดังนี้
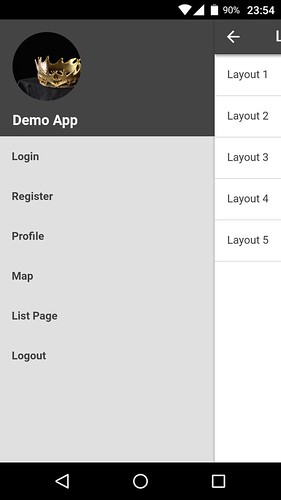
1. สร้างเมนูไปหน้า listpage ไว้ในเมนูด้านซ้าย side menu
2. ปรับ css style ให้กับ รายการ list ในหน้า listpage ให้มีเส้นขอบ เนื่องจาก ionic material
ได้ตัดส่วนของขอบเส้นนี้ออกไป เราจึงใช้วิธีเพิ่ม css class เข้าไปในรายการ list แทน
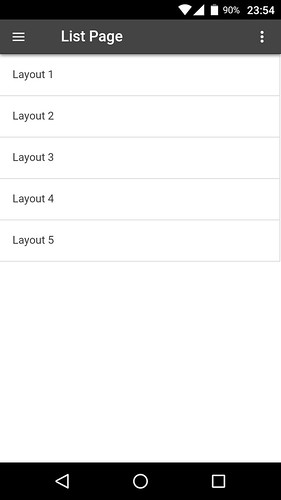
3. ทำการเพิ่มหน้าหลัก ชื่อ listpage.html ไว้แสดงลิสรายการ layout ทั้ง 5 ให้คลิกเลือก
4. สร้างไฟล์ layout ทั้ง 5 รูปแบบ
5. สร้าง state ให้กับ หน้า listpage และหน้า layout ทั้ง 5
6. สร้าง controller ให้กับ หน้า listpage และหน้า layout ทั้ง 5
1. สร้างเมนูไปหน้า listpage ไว้ในเมนูด้านซ้าย side menu
เปิดไฟล์ menu.html ในโฟลเดอร์ templates เพิ่มเมนูลิ้งค์ไปหน้า listpage ดังนี้
<ion-item nav-clear menu-close ui-sref="app.listpage">
    List Page
</ion-item>
2. ปรับ css style ให้กับ รายการ list
เปิดไฟล์ style.css ในโฟลเดอร์ css เพิ่ม css class นี้เข้าไปไว้ในด้านล่างสุดของไฟล์
/* List
==================================*/
.border-item{border: 1px solid #ddd !important;}
3. ทำการเพิ่มหน้าหลัก ชื่อ listpage.html
สร้างไฟล์ชื่อ listpage.html ไว้ในโฟลเดอร์ templates ตามโค้ดด้านล่าง
<ion-view view-title="List Page">
    <ion-nav-buttons side="right">
        <div class="buttons buttons-right header-item">
    <span class="right-buttons">
    <button class="button button-icon button-clear ion-android-more-vertical"> </button>
    </span>
        </div>
    </ion-nav-buttons>
    <ion-content ng-class="{expanded:isExpanded}">

        <ion-list>
            <ion-item class="border-item" ui-sref="app.layout1">
                Layout 1
            </ion-item>
            <ion-item class="border-item" ui-sref="app.layout2">
                Layout 2
            </ion-item>
            <ion-item class="border-item" ui-sref="app.layout3">
                Layout 3
            </ion-item>
            <ion-item class="border-item" ui-sref="app.layout4">
                Layout 4
            </ion-item>
            <ion-item class="border-item" ui-sref="app.layout5">
                Layout 5
            </ion-item>
        </ion-list>

    </ion-content>
</ion-view>
สังเกตว่าหน้า list page นี้จะเป็นหน้าหลักที่เราเพิ่มเข้ามา โดยในหน้านี้ เป็นหน้า
แสดงลิสรายการ layout หน้าย่อย ที่จะใช้สำหรับกดคลิกเข้าไปดูหน้าย่อยแต่ละรายการ
4. สร้างไฟล์ layout ทั้ง 5 รูปแบบ
ให้สร้างโฟลเดอร์ ย่อยในโฟลเดอร์ templates อีกทีเพิ่มแยกหน้า layout ออกจากหน้าหลัก
ในที่นี้ใช้ชื่อโฟลเดอร์ย่อยว่า layout จากนั้นสร้างไฟล์ layout1.html,layout2.html,layout3.html,
layout4.html และ layout5.html ตามรูปแบบดังนี้
layout1.html - มีปุ่มย้อนกลับ แท็บ header แถวเดียว ไม่มีปุ่ม fab
<ion-view view-title="Layout 1">
    <ion-nav-buttons side="left">
        <div class="buttons buttons-left header-item">
    <span class="left-buttons">
    <button ui-sref="app.listpage" class="button button-icon button-clear ion-android-arrow-back"> </button>
    </span>
        </div>
    </ion-nav-buttons>
    <ion-nav-buttons side="right">
        <div class="buttons buttons-right header-item">
    <span class="right-buttons">
    <button class="button button-icon button-clear ion-android-more-vertical"> </button>
    </span>
        </div>
    </ion-nav-buttons>
    <ion-content ng-class="{expanded:isExpanded}">


    </ion-content>
</ion-view>
layout2.html - มีปุ่มย้อนกลับ แท็บ header แสดงขยาย มีปุ่ม fab แสดงตำแหน่งบนขวา
<ion-view view-title="Layout 2">
    <ion-nav-buttons side="left">
        <div class="buttons buttons-left header-item">
    <span class="left-buttons">
    <button ui-sref="app.listpage" class="button button-icon button-clear ion-android-arrow-back"> </button>
    </span>
        </div>
    </ion-nav-buttons>
    <ion-nav-buttons side="right">
        <div class="buttons buttons-right header-item">
    <span class="right-buttons">
    <button class="button button-icon button-clear ion-android-more-vertical"> </button>
    </span>
        </div>
    </ion-nav-buttons>
    <ion-content ng-class="{expanded:isExpanded}">


    </ion-content>
</ion-view>
layout3.html - มีปุ่มย้อนกลับ แท็บ header แถวเดียว มีปุ่ม fab แสดงตำแหน่งล่างขวา
<ion-view view-title="Layout 3">
    <ion-nav-buttons side="left">
        <div class="buttons buttons-left header-item">
    <span class="left-buttons">
    <button ui-sref="app.listpage" class="button button-icon button-clear ion-android-arrow-back"> </button>
    </span>
        </div>
    </ion-nav-buttons>
    <ion-nav-buttons side="right">
        <div class="buttons buttons-right header-item">
    <span class="right-buttons">
    <button class="button button-icon button-clear ion-android-more-vertical"> </button>
    </span>
        </div>
    </ion-nav-buttons>
    <ion-content ng-class="{expanded:isExpanded}">


    </ion-content>
</ion-view>
layout4.html - มีปุ่มย้อนกลับ แท็บ header แสดงขยาย มีปุ่ม fab แสดงตำแหน่งบนขวา
<ion-view view-title="Layout 4">
    <ion-nav-buttons side="left">
        <div class="buttons buttons-left header-item">
    <span class="left-buttons">
    <button ui-sref="app.listpage" class="button button-icon button-clear ion-android-arrow-back"> </button>
    </span>
        </div>
    </ion-nav-buttons>
    <ion-nav-buttons side="right">
        <div class="buttons buttons-right header-item">
    <span class="right-buttons">
    <button class="button button-icon button-clear ion-android-more-vertical"> </button>
    </span>
        </div>
    </ion-nav-buttons>
    <ion-content ng-class="{expanded:isExpanded}">


    </ion-content>
</ion-view>
layout5 - มีปุ่มย้อนกลับ แท็บ header แถวเดียว มีปุ่ม fab แสดงตำแหน่งล่างซ้าย
<ion-view view-title="Layout 5">
    <ion-nav-buttons side="left">
        <div class="buttons buttons-left header-item">
    <span class="left-buttons">
    <button ui-sref="app.listpage" class="button button-icon button-clear ion-android-arrow-back"> </button>
    </span>
        </div>
    </ion-nav-buttons>
    <ion-nav-buttons side="right">
        <div class="buttons buttons-right header-item">
    <span class="right-buttons">
    <button class="button button-icon button-clear ion-android-more-vertical"> </button>
    </span>
        </div>
    </ion-nav-buttons>
    <ion-content ng-class="{expanded:isExpanded}">


    </ion-content>
</ion-view>
5. สร้าง state ให้กับ หน้า listpage และหน้า layout ทั้ง 5
ในที่นี้จะขอยกไฟล์ app.js ในโฟลเดอร์ js ทั้งหมดมา สามารถดูแยกแต่ละส่วนและ
ทำความเข้าในเพิ่มเติมได้
angular.module('starter', [
    'ionic',
    'ngCordova','starter.services','starter.controllers',
    'ionic-material', 'ionMdInput']
)

.run(function($ionicPlatform,$ionicPopup,$cordovaDialogs) {
    $ionicPlatform.ready(function() {
        if (window.cordova && window.cordova.plugins.Keyboard) {
            cordova.plugins.Keyboard.hideKeyboardAccessoryBar(true);
        }
        if (window.StatusBar) {
            StatusBar.styleDefault();
        }
    });

})

.config(function($stateProvider, $urlRouterProvider, $ionicConfigProvider) {

    $ionicConfigProvider.views.maxCache(0);


    $stateProvider.state('app', {
        url: '/app',
        abstract: true,
        templateUrl: 'templates/menu.html',
        controller: 'AppCtrl'
    })

    .state('app.login', {
        url: '/login',
        views: {
            'menuContent': {
                templateUrl: 'templates/login.html',
                controller: 'LoginCtrl'
            },
            'fabContent': {
                template: ''
            }
        }
    })

    .state('app.register', {
        url: '/register',
        views: {
            'menuContent': {
                templateUrl: 'templates/register.html',
                controller: 'RegistCtrl'
            },
            'fabContent': {
                template: ''
            }
        }
    })

    .state('app.profile', {
        url: '/profile',
        views: {
            'menuContent': {
                templateUrl: 'templates/profile.html',
                controller: 'ProfileCtrl'
            },
            'fabContent': {
                template: '<button id="fab-profile" class="button button-fab button-fab-bottom-right button-energized-900"><i class="icon ion-plus"></i></button>',
                controller: function ($timeout) {
                }
            }
        }
    })

    .state('app.map', {// กำหนด state
        url: '/map',  // กำหนดตำแหน่งหน้า app คล้ายๆ url ในเว็บ
        views: {
            'menuContent': { // ส่วนของการแสดงใน view ชื่อ menuContent
                templateUrl: 'templates/map.html', // ใช้ template ชื่อ map.html
                controller: 'MapCtrl'// กำหนดชื่อ controller ที่จะใช้งาน
            },
            'fabContent': { // ส่วนของการแสดงใน view ชื่อ fabContent ไม่ได้กำหนดอะไร
                template: ''
            }
        }
    })

    .state('app.listpage', {// กำหนด state
        url: '/listpage',  // กำหนดตำแหน่งหน้า app คล้ายๆ url ในเว็บ
        views: {
            'menuContent': { // ส่วนของการแสดงใน view ชื่อ menuContent
                templateUrl: 'templates/listpage.html', // ใช้ template ชื่อ listpage.html
                controller: 'ListpageCtrl'// กำหนดชื่อ controller ที่จะใช้งาน
            },
            'fabContent': { // ส่วนของการแสดงใน view ชื่อ fabContent ไม่ได้กำหนดอะไร
                template: ''
            }
        }
    })

        .state('app.layout1', {// กำหนด state
            url: '/layout1',  // กำหนดตำแหน่งหน้า app คล้ายๆ url ในเว็บ
            views: {
                'menuContent': { // ส่วนของการแสดงใน view ชื่อ menuContent
                    templateUrl: 'templates/layout/layout1.html',
                    controller: 'Layout1Ctrl'
                },
                'fabContent': { // ส่วนของการแสดงใน view ชื่อ fabContent ไม่ได้กำหนดอะไร
                    template: ''
                }
            }
        })
        .state('app.layout2', {// กำหนด state
            url: '/layout2',  // กำหนดตำแหน่งหน้า app คล้ายๆ url ในเว็บ
            views: {
                'menuContent': { // ส่วนของการแสดงใน view ชื่อ menuContent
                    templateUrl: 'templates/layout/layout2.html',
                    controller: 'Layout2Ctrl'
                },
                'fabContent': { // ส่วนของการแสดงใน view ชื่อ fabContent ไม่ได้กำหนดอะไร
                    template: '<button id="fab-layout2" class="button button-fab button-fab-top-left expanded button-dark spin"><i class="icon ion-chatbubbles"></i></button>',
                    controller: function ($timeout) {
                        $timeout(function () {
                            document.getElementById('fab-layout2').classList.toggle('on');
                        }, 900);
                    }
                }
            }
        })
        .state('app.layout3', {// กำหนด state
            url: '/layout3',  // กำหนดตำแหน่งหน้า app คล้ายๆ url ในเว็บ
            views: {
                'menuContent': { // ส่วนของการแสดงใน view ชื่อ menuContent
                    templateUrl: 'templates/layout/layout3.html',
                    controller: 'Layout3Ctrl'
                },
                'fabContent': { // ส่วนของการแสดงใน view ชื่อ fabContent ไม่ได้กำหนดอะไร
                    template: '<button id="fab-layout3" class="button button-fab button-fab-bottom-right button-dark"><i class="icon ion-plus"></i></button>'
                }
            }
        })
        .state('app.layout4', {// กำหนด state
            url: '/layout4',  // กำหนดตำแหน่งหน้า app คล้ายๆ url ในเว็บ
            views: {
                'menuContent': { // ส่วนของการแสดงใน view ชื่อ menuContent
                    templateUrl: 'templates/layout/layout4.html',
                    controller: 'Layout4Ctrl'
                },
                'fabContent': { // ส่วนของการแสดงใน view ชื่อ fabContent ไม่ได้กำหนดอะไร
                    template: '<button id="fab-layout4" class="button button-fab button-fab-top-right expanded button-dark spin"><i class="icon ion-heart"></i></button>',
                    controller: function ($timeout) {
                        $timeout(function () {
                            document.getElementById('fab-layout4').classList.toggle('on');
                        }, 900);
                    }
                }
            }
        })
        .state('app.layout5', {// กำหนด state
            url: '/layout5',  // กำหนดตำแหน่งหน้า app คล้ายๆ url ในเว็บ
            views: {
                'menuContent': { // ส่วนของการแสดงใน view ชื่อ menuContent
                    templateUrl: 'templates/layout/layout5.html',
                    controller: 'Layout5Ctrl'
                },
                'fabContent': { // ส่วนของการแสดงใน view ชื่อ fabContent ไม่ได้กำหนดอะไร
                    template: '<button id="fab-layout5" class="button button-fab button-fab-bottom-left button-dark"><i class="icon ion-plus"></i></button>'
                }
            }
        })

    // ศึกษา state และ template ที่เนื้อหานี้
    // ionic material ภาคต่อ การทำงานของ state และ template ตอนที่ 2
    // https://www.ninenik.com/content.php?arti_id=698 via @ninenik

    $urlRouterProvider.otherwise('/app/login');
});
6. สร้าง controller ให้กับ หน้า listpage และหน้า layout ทั้ง 5
ในที่นี้จะยกมาเฉพาะ controller ที่กล่าวถึง สามารถนำค่าเหล่านี้แทรกเข้าไป
ในไฟล์ controllers.js ในโฟลเดอร์ js ได้
.controller('ListpageCtrl', function(
    $scope, $stateParams, $timeout, ionicMaterialInk, ionicMaterialMotion
    ,$ionicPlatform) {
    $scope.$parent.showHeader();
    $scope.$parent.clearFabs();
    $scope.$parent.setHeaderFab(false);
    $scope.$parent.hasShadow();

    $timeout(function() {
        $scope.isExpanded = false;
        $scope.$parent.setExpanded(false);
    }, 300);


    ionicMaterialMotion.fadeSlideInRight();

    ionicMaterialInk.displayEffect();

})

    .controller('Layout1Ctrl', function(
        $scope, $stateParams, $timeout, ionicMaterialInk, ionicMaterialMotion
        ,$ionicPlatform) {
        $scope.$parent.showHeader();
        $scope.$parent.clearFabs();
        $scope.$parent.setHeaderFab(false);
        $scope.$parent.hasShadow();

        $timeout(function() {
            $scope.isExpanded = false;
            $scope.$parent.setExpanded(false);
        }, 300);


        ionicMaterialMotion.fadeSlideInRight();

        ionicMaterialInk.displayEffect();

    })
    .controller('Layout2Ctrl', function(
        $scope, $stateParams, $timeout, ionicMaterialInk, ionicMaterialMotion
        ,$ionicPlatform) {
        $scope.$parent.showHeader();
        $scope.$parent.clearFabs();
        $scope.$parent.setHeaderFab('left');
        $scope.$parent.hasShadow();

        $timeout(function() {
            $scope.isExpanded = true;
            $scope.$parent.setExpanded(true);
        }, 300);


        ionicMaterialMotion.fadeSlideInRight();

        ionicMaterialInk.displayEffect();

    })
    .controller('Layout3Ctrl', function(
        $scope, $stateParams, $timeout, ionicMaterialInk, ionicMaterialMotion
        ,$ionicPlatform) {
        $scope.$parent.showHeader();
        $scope.$parent.clearFabs();
        $scope.$parent.setHeaderFab(true);
        $scope.$parent.hasShadow();

        $timeout(function() {
            $scope.isExpanded = false;
            $scope.$parent.setExpanded(false);
        }, 300);


        // ionicMaterialMotion.fadeSlideInRight();
        ionicMaterialMotion.fadeSlideInRight();

        ionicMaterialInk.displayEffect();

    })
    .controller('Layout4Ctrl', function(
        $scope, $stateParams, $timeout, ionicMaterialInk, ionicMaterialMotion
        ,$ionicPlatform) {
        $scope.$parent.showHeader();
        $scope.$parent.clearFabs();
        $scope.$parent.setHeaderFab(false);
        $scope.$parent.hasShadow();

        $timeout(function() {
            $scope.isExpanded = true;
            $scope.$parent.setExpanded(true);
        }, 300);


        ionicMaterialMotion.fadeSlideInRight();

        ionicMaterialInk.displayEffect();

    })
    .controller('Layout5Ctrl', function(
        $scope, $stateParams, $timeout, ionicMaterialInk, ionicMaterialMotion
        ,$ionicPlatform) {
        $scope.$parent.showHeader();
        $scope.$parent.clearFabs();
        $scope.$parent.setHeaderFab(true);
        $scope.$parent.hasShadow();

        $timeout(function() {
            $scope.isExpanded = false;
            $scope.$parent.setExpanded(false);
        }, 300);


        ionicMaterialMotion.fadeSlideInRight();

        ionicMaterialInk.displayEffect();

    })

    //////////////// END LAYOUT CTRL
7. ทำการ build apk ไฟล์แล้วนำไปทดสอบติดตั้งบนมือถือ
ด้วยคำสั่ง
C:\phonegap\learn001>phonegap build android
ให้ทำการทดสอบติดตั้งในมือถือ android ของเรา จะได้หน้าตา app ประมาณนี้