
เนื้อหาต่อเนื่องจากตอนที่ 5
phonegap กับการใช้งาน ionic framework ตอนที่ 5
https://www.ninenik.com/content.php?arti_id=512 via @ninenik
เปิดไฟล์ index.html จากนั้น ให้ลบ โค้ดทั้งหมดออกไป
แล้วแทนที่ด้วยรูปแบบ โค้ดเริ่มต้น ตามด้านล่าง
<!DOCTYPE html>
<html ng-app="myIonicApp">
    <head>
        <meta charset="utf-8" />
        <meta name="format-detection" content="telephone=no" />
        <meta name="msapplication-tap-highlight" content="no" />
        <!-- WARNING: for iOS 7, remove the width=device-width and height=device-height attributes. See https://issues.apache.org/jira/browse/CB-4323 -->
<!--        <meta name="viewport" content="user-scalable=no, initial-scale=1, maximum-scale=1, minimum-scale=1, width=device-width, height=device-height, target-densitydpi=device-dpi" />-->
        <meta name="viewport" content="initial-scale=1, maximum-scale=1, user-scalable=no, width=device-width">
        <link href="css/ionic.css" rel="stylesheet">
        <script type="text/javascript" src="js/ionic.bundle.js"></script>
    <script type="text/javascript" src="cordova.js"></script>
    <script type="text/javascript" src="js/index.js"></script>
        <title>MyIonicApp 1</title>
    </head>
    <body ng-controller="myIonicHome">

    </body>
</html>
โค้ดเริ่มต้น ด้านบน เราจะใช้เป็นต้นแบบ สำหรับการเริ่ม project ใหม่ ๆ
สังเกตในส่วนของ html จะมี attribute คล้ายๆ เป็น namespace สำหรับ ใช้
อ้างอิงใน angularjs และในส่วนของ body ก็มีเหมือนกัน ค่อยศึกษาไปพร้อมกัน
โดยในโค้ดเริ่มต้น จะดึง ไฟล์ตางๆ ที่จำเป็นต้องใช้ ทั้งที่เป็น css และ javascript
รวมถึวการกำหนด การแสดงผล meta name="viewport" และก็มี comment แจ้งเตือน
สำหรับการกำหนดค่า ใน ios7 ส่วนตรงนี้ไม่มีผลกับ android ทั้งไว้หรือลบออกก็ได้
** หมายเหตุ อย่าลืมว่า ขณะเราเริ่มต้นเขียนโค้ด เราต้อง run phonegap developer
ผ่านมือถือ หรือ emulator ไปพร้อมๆ ด้วย ในที่นี้ไม่ได้เขียนอธิบายไว้
ให้ดูวิธีการได้ที่ ตอนที่ 3
phonegap สร้าง project แรก กับ HelloWorld ตอนที่ 3
https://www.ninenik.com/content.php?arti_id=510 via @ninenik
จากโค้ดด้านบน จะเป็นหน้าเปล่าๆ ว่าง
แล้วจะไปยังไงต่อ ไม่เคยใช้งาน ionic framework มาก่อน
ง่ายๆ เลย copy and paste
(คำสั่ง tools หรือแม้แต่การเรียกใช้งาน สมัยนี้มีเยอะมาก จำไม่ไหว)
เราจะเพิ่ม header content และ footer ให้ งานของเรา
ไปที่ header ก่อน
// ณ ตอนเขียนเนื้อหา url ด้านบน ยังใช้ได้
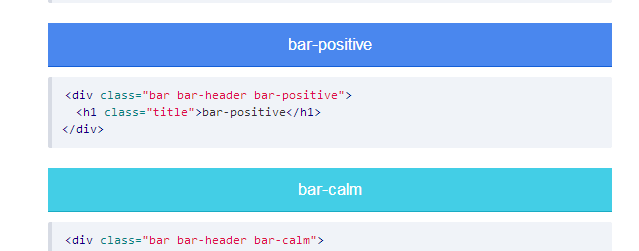
เราจะเอา header สีน้ำเงิน เน้นสีสันหน่อย จะได้สะดุด
<div class="bar bar-header bar-positive">
  <h1 class="title">My Home Ionic</h1>
</div>
เปลี่ยน title จะได้รู้สึกว่าได้เขียนอะไรบ้าง
เอาโค้ดนี้แทรก ต่อเข้าไปใน body
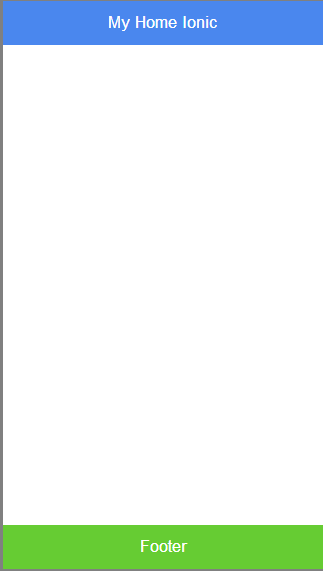
ต่อมาข้ามมาส่วนของ footer ก่อน
// ณ ตอนเขียนเนื้อหา url ด้านบน ยังใช้ได้
<div class="bar bar-footer bar-balanced">
  <div class="title">Footer</div>
</div>
เอาไปวางใกล้ กับ ปิด body
จะได้รูปแบบตามรูป
และอีกส่วนสำคัญ ส่วนของเนื้อหา ส่วนนี้ จะมีการใช้งาน
หรือการปรับแต่งค่อนข้างมาก ในที่นี้ จะเป็นตัวอย่างการนำมาใช้
แบบง่ายก่อน
รวมทั้ง จะเริ่มต้น ใช้งาน angularjs อย่างง่ายด้วย
        <ion-content>
                <br>
                <br>
                <br>

                <div style="margin:auto;text-align:center;">
                {{greeting}}
                </div>

                <br>
        </ion-content>
เมื่อแทรกโค้ดในส่วนของเนื้อหาเข้าไป จะได้ ดังรูปด้านล่าง
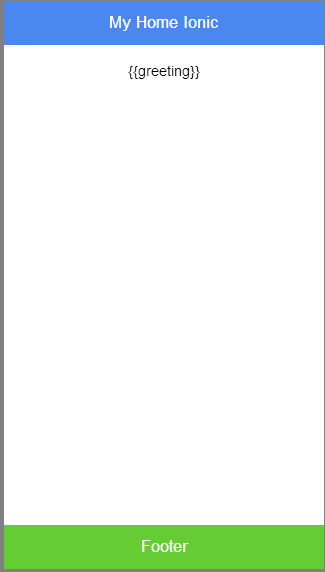
จะเห็นว่าเรามีกำหนดรูปแบบ คล้ายกับ template สำหรับแสดงข้อความ โดยใช้
{{greeting}}
ไฟล์ index.html ทั้งหมด
<!DOCTYPE html>
<html ng-app="myIonicApp">
    <head>
        <meta charset="utf-8" />
        <meta name="format-detection" content="telephone=no" />
        <meta name="msapplication-tap-highlight" content="no" />
        <!-- WARNING: for iOS 7, remove the width=device-width and height=device-height attributes. See https://issues.apache.org/jira/browse/CB-4323 -->
<!--        <meta name="viewport" content="user-scalable=no, initial-scale=1, maximum-scale=1, minimum-scale=1, width=device-width, height=device-height, target-densitydpi=device-dpi" />-->
        <meta name="viewport" content="initial-scale=1, maximum-scale=1, user-scalable=no, width=device-width">
        <link href="css/ionic.css" rel="stylesheet">
        <script type="text/javascript" src="js/ionic.bundle.js"></script>
    <script type="text/javascript" src="cordova.js"></script>
    <script type="text/javascript" src="js/index.js"></script>
        <title>MyIonicApp 1</title>
    </head>
    <body ng-controller="myIonicHome">

        <div class="bar bar-header bar-positive">
          <h1 class="title">My Home Ionic</h1>
        </div>


        <ion-content>
                <br>
                <br>
                <br>

                <div style="margin:auto;text-align:center;">
                {{greeting}}
                </div>

                <br>
        </ion-content>

    <div class="bar bar-footer bar-balanced">
      <div class="title">Footer</div>
    </div>

    </body>
</html>
ต่อไป เราจะใช้งาน angularjs พี่สั่งให้ ข้อความตรง template แสดงค่าตามที่เรากำหนด
ในที่นี้จะให้แสดงคำว่า Hello World
ให้เราเปิดไฟล์ index.js ในโฟลเดอร์ js
เลื่อนมาด้านล่างสุด ไม่ต้องสนใจโค้ดก่อนหน้า
จากนั้นให้เพิ่มโค้ด ต่อไปนี้ต่อเข้าไปด้านล่าง
angular.module('myIonicApp', ['ionic'])
.controller('myIonicHome', function($scope) {
 $scope.greeting="Hello World";
});
ไฟล์ index.js ทั้งหมด
/*
 * Licensed to the Apache Software Foundation (ASF) under one
 * or more contributor license agreements.  See the NOTICE file
 * distributed with this work for additional information
 * regarding copyright ownership.  The ASF licenses this file
 * to you under the Apache License, Version 2.0 (the
 * "License"); you may not use this file except in compliance
 * with the License.  You may obtain a copy of the License at
 *
 * http://www.apache.org/licenses/LICENSE-2.0
 *
 * Unless required by applicable law or agreed to in writing,
 * software distributed under the License is distributed on an
 * "AS IS" BASIS, WITHOUT WARRANTIES OR CONDITIONS OF ANY
 * KIND, either express or implied.  See the License for the
 * specific language governing permissions and limitations
 * under the License.
 */
var app = {
    // Application Constructor
    initialize: function() {
        this.bindEvents();
    },
    // Bind Event Listeners
    //
    // Bind any events that are required on startup. Common events are:
    // 'load', 'deviceready', 'offline', and 'online'.
    bindEvents: function() {
        document.addEventListener('deviceready', this.onDeviceReady, false);
    },
    // deviceready Event Handler
    //
    // The scope of 'this' is the event. In order to call the 'receivedEvent'
    // function, we must explicitly call 'app.receivedEvent(...);'
    onDeviceReady: function() {
        app.receivedEvent('deviceready');
    },
    // Update DOM on a Received Event
    receivedEvent: function(id) {
        var parentElement = document.getElementById(id);
        var listeningElement = parentElement.querySelector('.listening');
        var receivedElement = parentElement.querySelector('.received');

        listeningElement.setAttribute('style', 'display:none;');
        receivedElement.setAttribute('style', 'display:block;');

        console.log('Received Event: ' + id);
    }
};
angular.module('myIonicApp', ['ionic'])
.controller('myIonicHome', function($scope) {
    $scope.greeting="Hello World";
});
ผลลัพธ์ที่ได้ ตามรูป ค่า {{greeting}} จะถูกเปลี่ยนเป็น Hello World

จะค่อยอธิบาย และศึกษา angularjs ไปพร้อมๆ กับ เนื้อหาในตอนหน้า
สำหรับตอนนี้ แค่นี้ก่อน
