
เราได้รู้จัก Intervention Image มาบ้างแล้วจากบทความก่อนๆ หน้า สามารถทบทวนหรือกลับไป
ดูย้อนเพิ่มเติมได้ที่
คำสั่ง_วิธีการ_ใช้งาน_การประยุกต์_ตัวอย่าง_เกี่ยวกับ-intervention_image
ต่อไปนี้ จะเป็นแนวทางการจัดการเกี่ยวกับ url หรือ path ของรูปภาพบน server ยกตัวอย่างเช่น เรามีการ
จัดเก็บรูปภาพไว้บน server ที่โฟลเดอร์ uploadimage สมมติว่าไฟล์เราชื่อ mypicture.jpg มีความกว้างความ
สูงเท่ากับ 1200 x 630 px ดังนั้นตำแหน่ง url ของไฟล์บน server ก็จะเป็น
http://www.mywebsite.com/uploadimage/mypicture.jpg
url ข้างตันก็เป็นต้นฉบับของไฟล์บน server ที่มีขนาด 1200 x 630 px
เวลานำไปใช้งาน หากต้องการแสดงรูปในขนาดต่างๆ เราก็สามารถกำหนดค่าในส่วนของแท็ก <img> หรือกำหนด
ในส่วนของ css style เป็นดังนี้
<img src="http://www.mywebsite.com/uploadimage/mypicture.jpg" width="500" />
หรือ
<img src="http://www.mywebsite.com/uploadimage/mypicture.jpg" style="width:500px;">
หรือ
<style type="text/css">
.myimageclass{
	width:500px;
}
</style>
<img src="http://www.mywebsite.com/uploadimage/mypicture.jpg" class="myimageclass" />
ตามตัวอย่างข้างต้น จะเห็นว่าไฟล์ที่ถูกเรียกใช้งานจะเป็นไฟล์ต้นฉบับที่มีขนาดไฟล์ค่อนข้างใหญ่ ถึงแม้จะมีการ
นำมาแสดงโดยมีการปรับขนาดการแสดงให้เล็กลงก็ตาม แต่ขนาดไฟล์ที่โหลดมาแสดงก็ยังเป็นไฟล์ขนาดใหญ่
ซึ่งหากมีการแสดงรูปในลักษณะนี้จำนวนมากๆ ในหน้าเพจ ก็จะทำให้โหลดช้าหรือกินทรัพยากรในฝั่งของ server
ค่อนข้างมาก
สำหรับแนวทางการประยุกต์ที่จะนำเสนอ เป็นการอาศัยความสามารถของ Intervention Image มาช่วยในการ
สร้างไฟล์ใหม่ ขนาดต่างๆ ผ่านการกำหนดใน url สำหรับการใช้งาน Intervention Image ได้อธิบายรายละเอียด
ไปแล้ว สามารถย้อนไปอ่านตามลิ้งค์ที่แนะนำไปด้านบน ในเนื้อหานี้ จะเน้นไปที่ตัวอย่างการใช้งาน
ยกตัวอย่างกับการประยุกต์กรณีนำไปใช้งานจริง เช่น เราต้องการใช้งานรูปภาพกับระบบของ LINE API
ในการสร้าง imagemap ใน LINE Message API ต้องการใช้งานรูปแบบ url ของไฟล์เป็นดังนี้
https://example.com/images/cats
สำหรับภาพต้นฉบับหรือภาพที่กำหนดค่าเริ่มต้น
และขนาดความกว้างของไฟล์ที่ 700 px เป็นดังนี้
https://example.com/images/cats/700
ประมาณนี้เป็นต้น
เริ่มเต้น ให้เราสร้างโฟลเดอร์ขึ้นมาบน server ในที่นี้แนะนำให้สร้างอย่างน้อยสองขั้น เพื่อป้องกันการกำหนด
mod_rewrite ที่อาจจะซ้ำหรือกระทบต่อการกำหนด mod_rewrite ที่ root และชื่อโฟลเดอร์ควรเป็นชื่อ
จำเพราะได้จะดี สมมตติเรากำหนดเป็น
imgsrc > photos
ก็จะได้โฟลเดอร์ imgsrc และมีไฟล์เดอร์ photos อยู่ด้านใน จากนั้นให้เราสร้างไฟล์
ชื่อไฟล์ pic.php ไฟล์นี้จะมีการใช้งาน Intervention Image รูปแบบไฟล์เริ่มต้นเป็นดังนี้
<?php
// กรณีต้องการตรวจสอบการแจ้ง error ให้เปิด 3 บรรทัดล่างนี้ให้ทำงาน กรณีไม่ ให้ comment ปิดไป
ini_set('display_errors', 1);
ini_set('display_startup_errors', 1);
error_reporting(E_ALL);

// include composer autoload
require_once '../../vendor/autoload.php';
// กรณีมีการเชื่อมต่อกับฐานข้อมูล
//require_once("dbconnect.php");

// import the Intervention Image Manager Class
use Intervention\Image\ImageManager;

// ทดสอบแสดงค่า ตัวแปร $_GET ที่ส่งผ่าน url
echo "<pre>";
print_r($_GET);
?>
ลองมาดูผลลัพธ์เมื่อเราเรียกผ่านบราวเซอร์ โดยยังไม่ส่งค่าตัวแปร ใดๆ

ทีนี้มาดูว่าค่าอะไร ที่เป็นไปได้เบื้องต้นบ้างที่เราจะส่งไปกำหนดในการจัดการรูปภาพ
ซึ่งอาจจะเป็นดังนี้คือ มี
- ชื่อรูปภาพ file
- ขนาดความกว้าง width
- ความสูงที่ต้องการ height
- ลักษณะการจัดการรูปภาพ เช่น crop resize fit widen heighten ตามรูปแบบคำสั่งของ
Intervention Image สมมติเราใช้เป็นตัวย่อ c-crop r-resize ....
ลองใส่ตัวแปร GET เข้าไปใช้ url ดังนี้
http://www.mywebsite.com/imgsrc/photos/pic.php?mode=f&file=sampleimage.jpg&width=400&height=200
จะได้ผลลัพธ์เป็น
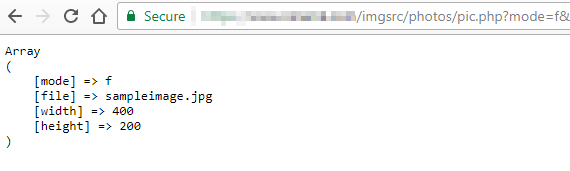
ตอนนี้คือเรามีตัว parameter ทั้งหมด 4 ตัวตามรูปด้านบน โดยบางค่าอาจจะมีค่าหรือไม่ก็ได้
ต่อไปเราจะทำ mod_rewrite เพื่อปรับ url ข้างต้น มีเงื่อนไขว่า url ใหม่ที่ทำ mod_rewrite ต้องส่ง
parameter ทั้ง 4 ได้เหมือนกับ url ก่อนทำ mod_rewrite ด้วย
รูปแบบที่เราต้องการคือ
http://www.mywebsite.com/imgsrc/photos/f/sampleimage/400
ให้เราสร้างไฟล์ .htaccess ไว้ในโฟลเดอร์ photos กำหนดค่าดังนี้
Options +FollowSymLinks -MultiViews
# Turn mod_rewrite on
RewriteEngine On
RewriteBase /imgsrc/photos
RewriteRule ^([f|c|r|w|h]+)/([^/]*)/([0-9]{2,})-([0-9]{2,})$ pic.php?mode=$1&file=$2&width=$3&height=$4 [NC,L,QSA]
RewriteRule ^([f|c|r|w|h]+)/([^/]*)/([0-9]{2,})$ pic.php?mode=$1&file=$2&width=$3 [NC,L,QSA]
RewriteRule ^([f|c|r|w|h]+)/([^/]*) pic.php?mode=$1&file=$2 [NC,L,QSA]
จากนั้นอัพโหลดขึ้น server ไว้ในโฟลเดอร์ photos แล้วทสอบเรียก url
http://www.mywebsite.com/imgsrc/photos/f/sampleimage/400-200
ก็จะได้ค่าตัวแปร GET ส่งมาครบ เหมือนก่อนทำ mod_rewrite ดังนี้
Array
(
    [mode] => f
    [file] => sample
    [width] => 400
    [height] => 200
)
โดยเงื่อนไขของ mod_rewrite ของ url ของเราก็คือ
f/sampleimage/400-200
ตัวแรก ต้องเป็นตัว f หรือ c หรือ r หรือ w หรือ h ผิดจากนี้ จะเข้า url หน้านั้นไม่ได้
ตัวที่สอง เป็นค่าอะไรก็ได้ ในที่นี้เราใช้ชื่อไฟล์ โดยตัดนามสกุลไฟล์ออก
ตัวที่สาม เป็นขนาดความกว้างที่ต้องการกำหนด มีหรือไม่ก็ได้
ตัวที่สี่ คั่นกับตัวที่สามด้วย ( - ) เป็นความสูงที่่ต้องการกำหนด ถ้าจะใช้งาน มีหรือไม่ก็ได้
รูปแบบ url ที่เราเรียกใช้งานได้ผ่าน mod_rewrite นี้ได้แก่
f/sampleimage  ส่งเฉพาะตัวแปร mode และ file
f/sampleimage/400 ส่งเฉพาะตัวแปร mode และ file และ width
f/sampleimage/400-200 ส่งตัวแปรทั้งหมด mode และ file และ width และ height
สุดท้ายก็ปรับไฟล์ pic.php ทำงานตามเงื่อนไขของตัวแปร parameter ที่ส่งมา
ในที่นี้ใช้รูปแบบ if else อย่างง่ายในการตรวจสอบเงื่อนไข เพื่อให้เข้าใจการทำงาน
โดยโฟลเดอร์รูปต้นฉบับจะอยู้ในโฟลเดอร์ uploadimage ที่ได้กล่าวไปแล้วในตอนต้นของบทความ
ไฟล์ pic.php
<?php
// กรณีต้องการตรวจสอบการแจ้ง error ให้เปิด 3 บรรทัดล่างนี้ให้ทำงาน กรณีไม่ ให้ comment ปิดไป
ini_set('display_errors', 1);
ini_set('display_startup_errors', 1);
error_reporting(E_ALL);

// include composer autoload
require_once '../../vendor/autoload.php';
// กรณีมีการเชื่อมต่อกับฐานข้อมูล
//require_once("dbconnect.php");

// import the Intervention Image Manager Class
use Intervention\Image\ImageManager;

if(isset($_GET['file']) && $_GET['file']!=""){
	$picFile = trim($_GET['file']);
	$originalFilePath = '../../uploadimage/'; // แก้ไขเป็นโฟลเดอร์รูปต้นฉบับ
	$fullFilePath = $originalFilePath.$picFile;
	$fullFilePathJPG = $fullFilePath.'.jpg';
	$fullFilePathPNG = $fullFilePath.'.png';
	$fullFile = '';
	$picType = '';
	if(file_exists($fullFilePathJPG)){
		$picType = 'jpg';
		$fullFile = $fullFilePath.'.'.$picType;
	}
	if(file_exists($fullFilePathPNG)){
		$picType = 'png';
		$fullFile = $fullFilePath.'.'.$picType;
	}
	if($picType==''){
		header("HTTP/1.0 404 Not Found");
		exit;
	}
	// สร้างตัวแปรอ้างอิง object ตัวจัดการรูปภาพ
	$manager = new ImageManager();
	$img = $manager->make($fullFile);
	if(isset($_GET['mode']) && $_GET['mode']=='f'){
		if(isset($_GET['width']) && $_GET['width']!="" && isset($_GET['height']) && $_GET['height']!=""){
			$img->fit($_GET['width'], $_GET['height'], function ($constraint) {
				$constraint->upsize(); // ถ้าค่าที่กำหนดมากกว่าค่าเดิม ไม่ต้องปรับขนาด
			});
		}else{
			// only width
			if(isset($_GET['width']) && $_GET['width']!=""){
				$img->fit($_GET['width']);
			}else{ // no width parameter

			}
		}
	}
	if(isset($_GET['mode']) && $_GET['mode']=='c'){
		if(isset($_GET['width']) && $_GET['width']!="" && isset($_GET['height']) && $_GET['height']!=""){
			$img->crop($_GET['width'], $_GET['height']);
		}else{
			// only width
			if(isset($_GET['width']) && $_GET['width']!=""){
				$img->crop($_GET['width'], $_GET['width']);
			}else{ // no width parameter

			}
		}
	}
	if(isset($_GET['mode']) && $_GET['mode']=='r'){
		if(isset($_GET['width']) && $_GET['width']!="" && isset($_GET['height']) && $_GET['height']!=""){
			$img->resize($_GET['width'], $_GET['height']);
		}else{
			// only width
			if(isset($_GET['width']) && $_GET['width']!=""){
				$img->resize($_GET['width'], null, function ($constraint) {
					$constraint->aspectRatio();// ให้คงสัดส่วนของรูปภาพ
				});
			}else{ // no width parameter

			}
		}
	}
	if(isset($_GET['mode']) && $_GET['mode']=='w'){
		// only width
		if(isset($_GET['width']) && $_GET['width']!=""){
			$img->widen($_GET['width'], function ($constraint) {
				$constraint->upsize(); // ถ้าค่าความกว้างที่กำหนดมากกว่าค่าเดิม ไม่ต้องปรับขนาด
			});
		}else{ // no width parameter

		}
	}
	if(isset($_GET['mode']) && $_GET['mode']=='h'){
		if(isset($_GET['width']) && $_GET['width']!="" && isset($_GET['height']) && $_GET['height']!=""){
			$img->heighten($_GET['height'], function ($constraint) {
				$constraint->upsize(); // ถ้าค่าความสูงที่กำหนดมากกว่าค่าเดิม ไม่ต้องปรับขนาด
			});
		}else{
			// only width
			if(isset($_GET['width']) && $_GET['width']!=""){
				$img->heighten($_GET['width'], function ($constraint) {
					$constraint->upsize(); // ถ้าค่าความสูงที่กำหนดมากกว่าค่าเดิม ไม่ต้องปรับขนาด
				});
			}else{ // no width parameter

			}
		}
	}

	// ส่ง HTTP header และข้อมูลของรูปเพื่อนำไปแสดง
	echo $img->response();
}else{
	header("HTTP/1.0 404 Not Found");
	exit;
}
?>
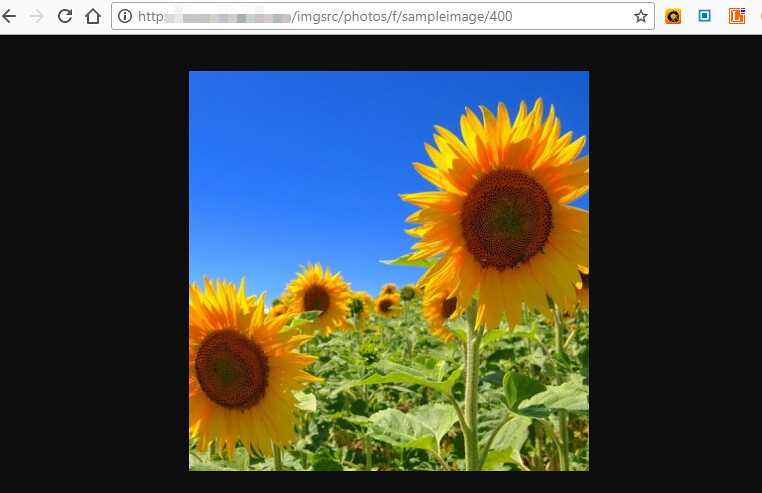
เป็นอันเสร็จเรียบร้อย เราสามารถทดสอบเรียกใช้การแสดงรูปภาพ ผ่าน url ในรูปแบบต่างๆ ดูการทำงาน
ของได้เลย ดูตัวอย่างผลลัพธ์ตามรูปด้านล่าง
สามารถใช้งานร่วมกับการ cache ได้โดยสามารถดูเพิ่มเติมได้ที่บทความ
วิธีใช้งานและประยุกต์การ cache รูปภาพด้วย Intervention Image ตอนที่ 3 https://www.ninenik.com/content.php?arti_id=824
 เนื้อหาที่เกี่ยวข้อง