
เนื้อหาตอนต่อไปนี้ก็เป็นการประยุกต์รายการใน
ListView เป็นวิธีการที่ทำให้เราสามารถกดเลือกรายการ
เฉพาะที่ต้องการ มาทำงานต่อได้ จากตอนที่แล้ว เราสามารถ
เลือกที่จะลบแต่ละรายการโดยการปัดรายการนั้นไปทางซ้าย
เพื่อทำการลบ ทบทวนได้ที่บทความ
การใช้งาน Dismissible Widget ร่วมกับ ListView ใน Flutter http://niik.in/1067
https://www.ninenik.com/content.php?arti_id=1067 via @ninenik
*เนื้อหานี้ใช้เนื้อหาต่อเนื่องจากบทความ http://niik.in/1067
แต่สมมติว่าเราต้องการเลือกหลายรายการ และลบในครั้งเดียวจะทำอย่างไร จึงมาสู่เนื้อหาใน
บทความตอนนี้ ที่เราสามารถที่จะกดเลือกรายการโฟล์หรือโฟลเดอร์ที่ต้องการ จากนั้นก็ทำการลบ
รายการที่เลือกในครั้งเดียว โดยไม่ต้องไล่ลบทีละรายการ
ตัวอย่างผลลัพธ์และการทำงาน
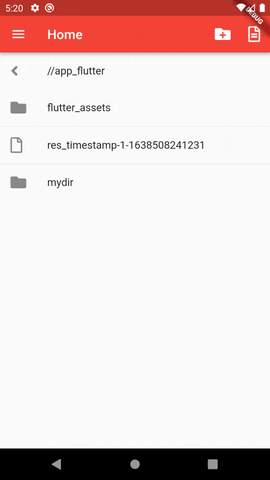
เราเข้าไปในโฟลเดอร์ที่ต้องการเลือกรายการ จากนั้นกดค้างที่รายการใด รายการหนึ่ง ก็จะเริ่มเข้าสู่โหมด
การเลือกรายการ สามารถกดเลือกรายการอื่นๆ ต่อได้ เมื่อมีการเลือกรายการอย่างน้อย 1 รายการ ปุ่มลบทั้งหมด
จะแสดงตรงมุมบนขวา ถ้าเรากดที่ปุ่มนั้น ก็จะมีหน้าต่างแจ้งยืนยันการลบ หากยืนยันการลบ ก็จะทำการลบ
รายการที่เลือกทั้งหมดออกไป
ในขั้นตอนการเลือกรายการ หากเราเปลี่ยนใจ ก็กดที่รายการที่เลือกนั้นอีกครั้ง ก็จะเป็นการยกเลิกการเลือก
รายการนั้นๆ
แนวทางการเลือกรายการใน ListView
ใน ListView จะมีค่า index ที่เริ่มจาก 0 เป็นตัวระบุว่าเป็นรายการตัวที่เท่าไหร่ ซึ่งค่าจะไม่ซ้ำกัน ดังนั้น เรา
จะใช้ค่านี้ไปบันทึกไว้ว่าเลือกรายการใดมาบ้าง
เริ่มต้นให้เรากำหนดตัวแปร สำหรับเก็บ index ที่เลือก ดังนี้
// ตัวแปรเก็บ index รายการที่เลือก
List<int> _selectedItems = [];
คำสั่งที่จะเช็คว่า มีการเลือกแล้วหรือไม่ ก็จะใช้วิธีนับจำนวนของรายการในตัวแปร _selectedItems ดังนี้
// ใช้คำสั่ง _selectedItems.isNotEmpty
// เช่น ถ้าไม่ว่าง ให้เป็น true ถ้าว่างยังไม่ได้เลือกรายการใดๆ ให้เป็น false
_selectedItems.isNotEmpty ? true : false
คำสั่งที่จะหาว่า มีรายการไหนอยู่ในรายการที่เลือกหรือไม่ จะใช้คำสั่งดังนี้
// มี index อยู่ในรายการที่เลือกหรือไม่
_selectedItems.contains(index)
// ตัวอย่าง สมมติเช่น
// _selectedItems = [2,4,5];
// _selectedItems.contains(1) จะเท่ากับ false คือไม่มี
ต่อไปส่วนของปุ่มลบทั้งหมดที่เลือก เราใช้ Visibility widget กำหนดเงื่อนไขการแสดงปุ่มนี้ก็ต่อเมื่อ
มีการเลือกรายการอย่างน้อย 1 รายการ ดังนี้
appBar: AppBar(
    title: Text('Home'),
    actions: <Widget>[ //
      IconButton(
        onPressed: _newFolder, // สร้างโฟลเดอร์ใหม่
        icon: FaIcon(FontAwesomeIcons.folderPlus),
      ),
      IconButton(
        onPressed: _newFile, // สร้างไฟล์ใหม่
        icon: FaIcon(FontAwesomeIcons.fileAlt),
      ),
      Visibility(
        visible: _selectedItems.isNotEmpty ? true : false, // ถ้ามีการเลือกให้แสดง
        child: IconButton(
          onPressed: _deleteAll,
          icon: FaIcon(FontAwesomeIcons.trashAlt),
        ),
      )
    ],
),
ใน Flutter เราสามารถกำหนดเงื่อนไขโดยไม่ต้องใช้ Visibility widget ก็ได้ โดยสามารถใช้เป็นดังนี้
appBar: AppBar(
    title: Text('Home'),
    actions: <Widget>[ //
      IconButton(
        onPressed: _newFolder, // สร้างโฟลเดอร์ใหม่
        icon: FaIcon(FontAwesomeIcons.folderPlus),
      ),
      IconButton(
        onPressed: _newFile, // สร้างไฟล์ใหม่
        icon: FaIcon(FontAwesomeIcons.fileAlt),
      ),
      if(_selectedItems.isNotEmpty)
      IconButton(
          onPressed: _deleteAll,
          icon: FaIcon(FontAwesomeIcons.trashAlt),
        ),
    ],
),
จะเห็นว่าเราแทรกเงื่อนไข if เข้าไปตามตัวอย่าง ตัว widget แรกที่อยู่ต่อจากเงื่อนไข จะเป็นส่วนที่เข้าเงื่อนไข
ที่กำหนด วิธีนี้อาจจะสะดวก แต่บางครั้งก็ทำให้เราดูโค้ดเข้าใจได้ยากขึ้น ดังนั้นเราจึงใช้ Visibility widget แทน
การเพิ่ม และการลบ รายการที่เลือก
รูปแบบการทำงานเดิมของเราคือ การทำงานใน onTap หรือการเลือกที่รายการไฟล์ หรือโฟลเดอร์ สำหรับไฟล์
เรายังไม่ได้กำหนดการทำงานไว้ แต่สำหรับโฟลเดอร์ เรากำหนดว่า ถ้ากดแตะที่เราการ ก็จะเป็นการเปิดโฟลเดอร์
นั้นขึ้นมา ดังนั้นในขั้นตอนการเริ่มต้นการเลือกรายการ เราจะใช้เป็น onLongPress แทน หรือก็คือการกดค้างที่ราย
การนั้นๆ ก็จะเป็นการเริ่มการเลือกรายการ
อย่างไรก็ตาม เราคงไม่ต้องการเลือกรายการ โดยการกดค้างนานๆ ทุกรายการที่ต้องการ เราจึงต้องประยุกต์กับ
onTap ก็คือ ถ้ามีเลือก 1 รายการก็ให้สามารถเลือกโดยใช้ onTap แทนได้ ดูโค้ดส่วนของการทำงานการเลือก
และการลบรายการที่เลือก ดังนี้
// กรณีกดค้างนานๆ เราจะเริ่มการเลือก
onLongPress: (){
if(! _selectedItems.contains(index)){ // ยังไม่มีรายการที่เลือก
  setState(() {
    _selectedItems.add(index); // เพิ่มรายการที่เลือกนี้เข้าไป
  });
}
},
// กรณีการกดปกติ เรามีการกำหนดการทำงานสำหรับโฟลเดอร์ และ ไฟล์ แยกกัน
onTap: (isFolder==true)
? (){ // กรณีเป้นโฟลเดอร์
  if(_selectedItems.contains(index)){ // เคยเลือกแล้วกดอืก คือลบออก
    setState(() {
      _selectedItems.removeWhere((val) => val == index); // ลบที่เลือกออก
    });
  }else{ // ยังไม่เคยเลือก
    if(_selectedItems.isNotEmpty){ // แต่มีเลือกรายการอื่นแล้ว สามารถกดเพิ่อเพิ่มได้
      setState(() {
        _selectedItems.add(index); // เพิ่มรายการที่เลือกนี้เข้าไป
      });
    }else{
      _setPath(_folders![index]!); // ถ้ากด ให้ทำคำสั่งเปิดโฟลเดอร์
    }
  }
}
: (){ // กรณีเป้นโฟล์
  if(_selectedItems.contains(index)){ // เคยเลือกแล้วกดอืก คือลบออก
    setState(() {
      _selectedItems.removeWhere((val) => val == index); // ลบที่เลือกออก
    });
  }else{ // ยังไม่เคยเลือก
    if(_selectedItems.isNotEmpty){ // แต่มีเลือกรายการอื่นแล้ว สามารถกดเพิ่อเพิ่มได้
      setState(() {
        _selectedItems.add(index); // เพิ่มรายการที่เลือกนี้เข้าไป
      });
    }
  }
},
จะเห็นว่าส่วนของ onLongPress จะเป็นการเริ่มต้นการเลือก ดังนั้นเมื่อกดค้างที่รายการใด ก็จะเช็คดว่าถ้ายังไม่มี
การเลือกรายการใดๆ ก็จะทำการเพิ่มรายการที่กดค้าง เป็นรายการที่เลือกรายการแรก พอมีอย่างน้อย 1 รายการที่เลือก
แล้ว เราไม่จำเป็นต้องกดค้างทุกๆ รายการที่จะเลือก เพราะเราเอามากำหนดใน onTap แทน โดยเช็คว่า ถ้ามีเลือก
รายการใดๆ แล้ว สามารถกดปกติ เพื่อเลือกรายการนี้ได้
การเพิ่มรายการก็จะเป็นการ เพิ่ม index ของรายการที่เลือกเข้าไปในตัวแปร _selectedItems
_selectedItems.add(index); // เพิ่มรายการที่เลือกนี้เข้าไป
การลบรายการก็จะเป็นการ ลบ index ของรายการที่เลือกออกจากตัวแป _selectedItems
_selectedItems.removeWhere((val) => val == index);
สถานะรายการที่เลือก
ใน ListTile จะมีสถานะการเลือกใน property ที่ชื่อ selected รองรับค่า true หรือ false โดยถ้าเป็น true
สีของรายการก็จะเป็นสีของ theme หรือ primary color เราสามารถกำหนดสถานะ โดยเทียบว่า รายการนี้
ถูกเลือกแล้วหรือไม่ในรูปแบบ
ListTile(
  selected: _selectedItems.contains(index) ? true : false,
....
..
นอกจากนั้นเรายังสามารถกำหนดรูปไอคอนให้กับ trailing เป็นเครื่องหมายถูก ว่าเลือกแล้ว ได้ดังนี้
ListTile(
  selected: _selectedItems.contains(index) ? true : false,
....
..
  trailing: Visibility(
    visible: _selectedItems.contains(index) ? true : false,
    child: FaIcon(FontAwesomeIcons.checkCircle),
  ),
การลบรายการที่เลือกทั้งหมด
เนื่องจากตัวแปร _selectedItems จะเก็บ index ของข้อมูลไฟล์และโฟลเดอร์ที่เราจะลบทั้งหมด คำสั่งลบ
ข้อมูลทั้งหมดจะเป็นดังนี้
// ลบข้อมูลที่เลือกทั้งหมด
void _deleteAll() async {
  bool _confirm; // สร้างตัวแปรรับค่า ยืนยันการลบ
  _confirm = await showDialog(
    context: context,
    builder: (context) {
      return AlertDialog(
        title: const Text("Confirm"),
        content: const Text("Are you sure you wish to delete selected item?"),
        actions: <Widget>[
          ElevatedButton(
            onPressed: () => Navigator.of(context).pop(true),
            child: const Text("DELETE")
          ),
          ElevatedButton(
            onPressed: () => Navigator.of(context).pop(false),
            child: const Text("CANCEL"),
          ),
        ],
      );
    },
  );
  if(_confirm){ // ถ้ายืนยันการลบ เป็น true
    try{
      // วนลูป index แล้วอ้างอึงข้อมูลไฟล์ จากนั้นใช้คำสั่ง delete() แบบรองรับการลบข้อมูลด้านในถ้ามี
      // ในกรณีเป็นโฟลเดอร์
      _selectedItems.forEach((index) async {
        await _folders![index]!.delete(recursive: true);
      });
    }catch(e){
      print(e);
    }
    // โหลดข้อมูลใหม่อีกครั้ง
    setState(() {
      _setPath(_currentFolder!);
    });
  }
}
เนื่องจากทั้งไฟล์และโฟลเดอร์มีคำสั่งลบในรุปแบบด้วยกันคือ delete() ดังนั้น ถ้าเราสามารถอ้างอิงข้อมูล
ผ่าน index ได้ ก็สามารถวนลูปลบรายการได้ง่าย เหมือนโค้ดด้านบน
ตอนนี้เหลือส่วนสุดท้ายก็คือ การล้างค่าการเลือก รายการ เราสามารถยกเลิกรายการที่เลือก โดยกดซ้ำ
อีกครั้งในรายการที่เลือก แต่ถ้าสมมติว่า เราเลือกไว้แล้ว แต่เปลี่ยน โฟลเดอร์อื่น กรณีนี้ค่าของ _selectedItems
ยังค้างอยู่ ดังนั้นเมื่อเปลี่ยนโฟลเดอร์ที่กำลังใช้งาน เราต้องทำการ clear รายการที่เลือก เพื่อเลือกใหม่เสมอ
ด้วยคำสั่งดังนี้
_selectedItems.clear(); // ล้างค่าการเลือกทั้งหมด
คำสั่งนี้เราจะเพิ่มเข้าไปในคำสั่ง _setPath() ให้ทำงานทุกครั้งที่เปลี่ยนโฟลเดอร์หรือเปิดโฟลเดอร์ใหม่
ไฟล์ explorer.dart
import 'dart:io';
import 'package:flutter/material.dart';
import 'package:font_awesome_flutter/font_awesome_flutter.dart';
import 'package:path_provider/path_provider.dart';
class Explorer extends StatefulWidget {
static const routeName = '/explorer';
const Explorer({Key? key}) : super(key: key);
@override
State<StatefulWidget> createState() {
return _ExplorerState();
}
}
class _ExplorerState extends State<Explorer> {
List<FileSystemEntity?>? _folders;
String _currentPath = ''; // เก็บ path ปัจจุบัน
Directory? _currentFolder; // เก็บ โฟลเดอร์ที่กำลังใช้งาน
// ตัวแปรเก็บ index รายการที่เลือก
List<int> _selectedItems = [];
@override
void initState() {
// TODO: implement initState
super.initState();
_loadFolder();
}
void _loadFolder() async {
// ข้อมูลเกี่ยวกับโฟลเดอร์ Directory ต่างๆ
final tempDirectory = await getTemporaryDirectory();
final appSupportDirectory = await getApplicationSupportDirectory();
final appDocumentsDirectory = await getApplicationDocumentsDirectory();
final externalDocumentsDirectory = await getExternalStorageDirectory();
final externalStorageDirectories = await getExternalStorageDirectories(type: StorageDirectory.music);
final externalCacheDirectories = await getExternalCacheDirectories();
/* print(tempDirectory);
print(appSupportDirectory);
print(appDocumentsDirectory);
print(externalDocumentsDirectory);
print(externalCacheDirectories);
print(externalStorageDirectories); */
// เมื่อโหลดขึ้นมา เาจะเปิดโฟลเดอร์ของ package เป้นโฟลเดอร์หลัก
_currentFolder = appDocumentsDirectory.parent;
_currentPath = appDocumentsDirectory.parent.path;
final myDir = Directory(_currentPath);
setState(() {
_folders = myDir.listSync(recursive: false, followLinks: false);
});
}
// เปิดโฟลเดอร์ และแสดงรายการในโฟลเดอร์
void _setPath(dir) async {
_currentFolder = dir;
_currentPath = dir.path;
final myDir = Directory(_currentPath);
try{
setState(() {
_folders = myDir.listSync(recursive: false, followLinks: false);
});
}catch(e){
print(e);
}
_selectedItems.clear(); // ล้างค่าการเลือกทั้งหมด
}
// คำสังลบไฟล์
void _deleteFile(path) async {
final deletefile = File(path); // กำหนด file object
final isExits = await deletefile.exists(); // เช็คว่ามีไฟล์หรือไม่
if(isExits){ // ถ้ามีไฟล์
try{
await deletefile.delete();
}catch(e){
print(e);
}
}
// โหลดข้อมูลใหม่อีกครั้ง
setState(() {
_setPath(_currentFolder!);
});
}
// คำสั่งลบโฟลเดอร์
void _deleteFolder(path) async {
final deleteFolder = Directory(path); // สร้าง directory object
var isExits = await deleteFolder.exists(); // เช็คว่ามีแล้วหรือไม่
if(isExits){ // ถ้ามีโฟลเดอร์
try{
await deleteFolder.delete(recursive: true);
}catch(e){
print(e);
}
}
// โหลดข้อมูลใหม่อีกครั้ง
setState(() {
_setPath(_currentFolder!);
});
}
// ลบข้อมูลที่เลือกทั้งหมด
void _deleteAll() async {
bool _confirm; // สร้างตัวแปรรับค่า ยืนยันการลบ
_confirm = await showDialog(
context: context,
builder: (context) {
return AlertDialog(
title: const Text("Confirm"),
content: const Text("Are you sure you wish to delete selected item?"),
actions: <Widget>[
ElevatedButton(
onPressed: () => Navigator.of(context).pop(true),
child: const Text("DELETE")
),
ElevatedButton(
onPressed: () => Navigator.of(context).pop(false),
child: const Text("CANCEL"),
),
],
);
},
);
if(_confirm){ // ถ้ายืนยันการลบ เป็น true
try{
// วนลูป index แล้วอ้างอึงข้อมูลไฟล์ จากนั้นใช้คำสั่ง delete() แบบรองรับการลบข้อมูลด้านในถ้ามี
// ในกรณีเป็นโฟลเดอร์
_selectedItems.forEach((index) async {
await _folders![index]!.delete(recursive: true);
});
}catch(e){
print(e);
}
// โหลดข้อมูลใหม่อีกครั้ง
setState(() {
_setPath(_currentFolder!);
});
}
}
// จำลองสร้างไฟล์ใหม่
void _newFile() async {
String newFile = "${_currentFolder!.path}/myfile.txt";
final myfile = File(newFile); // กำหนด file object
final isExits = await myfile.exists(); // เช็คว่ามีไฟล์หรือไม่
if(!isExits){ // ถ้ายังไม่มีไฟล์
try{
// สร้างไฟล์ text
var file = await myfile.writeAsString(
'Hello World'
);
print(file);
}catch(e){
print(e);
}
}
// โหลดข้อมูลใหม่อีกครั้ง
setState(() {
_setPath(_currentFolder!);
});
}
// คำสั่งจำลองการสร้างโฟลเดอร์
void _newFolder() async {
String newFolder = "${_currentFolder!.path}/mydir";
final myDir = Directory(newFolder); // สร้าง directory object
var isExits = await myDir.exists(); // เช็คว่ามีแล้วหรือไม่
if(!isExits){ // ถ้ายังไม่มีสร้างโฟลเดอร์ขึ้นมาใหม่
try{
var directory = await Directory(newFolder).create(recursive: true);
print(directory);
}catch(e){
print(e);
}
}
// โหลดข้อมูลใหม่อีกครั้ง
setState(() {
_setPath(_currentFolder!);
});
}
@override
Widget build(BuildContext context) {
return Scaffold(
appBar: AppBar(
title: Text('Explorer'),
actions: <Widget>[ //
IconButton(
onPressed: _newFolder, // สร้างโฟลเดอร์ใหม่
icon: FaIcon(FontAwesomeIcons.folderPlus),
),
IconButton(
onPressed: _newFile, // สร้างไฟล์ใหม่
icon: FaIcon(FontAwesomeIcons.fileAlt),
),
if(_selectedItems.isNotEmpty)
IconButton(
onPressed: _deleteAll,
icon: FaIcon(FontAwesomeIcons.trashAlt),
),
],
),
body: Column(
mainAxisAlignment: MainAxisAlignment.start,
children: <Widget>[
ListTile(
leading: FaIcon(FontAwesomeIcons.angleLeft),
title: Text('${_currentPath.replaceAll('/data/user/0/com.example.demo_app', '/')}'),
onTap: (){
_setPath(_currentFolder!.parent);
}
),
Expanded(
child: _folders!=null // เมื่อไม่ใช่ค่า null
? ListView.separated( // กรณีมีรายการ แสดงปกติ
itemCount: _folders==null ? 0 : _folders!.length,
itemBuilder: (context, index) {
var isFolder = _folders![index] is Directory ? true : false; // เช็คว่าเป็นโฟลเดอร์
var isFile = _folders![index] is File ? true : false; // เช็คว่าเป็นไฟล์
if(_folders![index] != null){
// เอาเฉพาะชื่อหลัง / ตัวสุดท้าย
String fileName = _folders![index]!.path.split('/').last;
return Dismissible(
direction: DismissDirection.horizontal,
key: UniqueKey(),
// dismissThresholds: const { DismissDirection.endToStart:1.0, DismissDirection.startToEnd:1.0},
confirmDismiss: (direction) async {
return await showDialog(
context: context,
builder: (context) {
return AlertDialog(
title: const Text("Confirm"),
content: const Text("Are you sure you wish to delete this item?"),
actions: <Widget>[
ElevatedButton(
onPressed: () => Navigator.of(context).pop(true),
child: const Text("DELETE")
),
ElevatedButton(
onPressed: () => Navigator.of(context).pop(false),
child: const Text("CANCEL"),
),
],
);
},
);
},
onDismissed: (direction) {
// ปัดไปทางขวา - บนลงล่าง
if(direction == DismissDirection.startToEnd){
}
// ปัดไปซ้าย - ล่างขึ้นบน
if(direction == DismissDirection.endToStart){
try{
setState(() {
if(isFile){ // ถ้าเป็นไฟล์ ส่ง path ไฟล์ไปลบ
_deleteFile(_folders![index]!.path);
}
if(isFolder){ // ถ้าเป็นโฟลเดอร์ส่ง path โฟลเดอร์ไปลบ
_deleteFolder(_folders![index]!.path);
}
// ต้องลบข้อมูลก่อน แล้วค่อยลบรายการในลิส
_folders!.removeAt(index);
});
}catch(e){
print(e);
}
}
ScaffoldMessenger.of(context)
.showSnackBar(SnackBar(content: Text('$index dismissed')));
},
background: Container(
color: Colors.green,
),
secondaryBackground: Container(
color: Colors.red,
child: Align(
alignment: Alignment.centerRight,
child: Padding(
padding: EdgeInsets.symmetric(horizontal: 10.0),
child: FaIcon(FontAwesomeIcons.trashAlt),
)
)
),
child: ListTile(
selected: _selectedItems.contains(index) ? true : false,
leading: isFolder
? FaIcon(FontAwesomeIcons.solidFolder)
: FaIcon(FontAwesomeIcons.file),
trailing: Visibility(
visible: _selectedItems.contains(index) ? true : false,
child: FaIcon(FontAwesomeIcons.checkCircle),
),
title: Text('${fileName}'),
onLongPress: (){
if(! _selectedItems.contains(index)){
setState(() {
_selectedItems.add(index);
});
}
},
onTap: (isFolder==true)
? (){ // กรณีเป้นโฟลเดอร์
if(_selectedItems.contains(index)){
setState(() {
_selectedItems.removeWhere((val) => val == index);
});
}else{
if(_selectedItems.isNotEmpty){
setState(() {
_selectedItems.add(index);
});
}else{
_setPath(_folders![index]!); // ถ้ากด ให้ทำคำสั่งเปิดโฟลเดอร์
}
}
}
: (){
if(_selectedItems.contains(index)){
setState(() {
_selectedItems.removeWhere((val) => val == index);
});
}else{
if(_selectedItems.isNotEmpty){
setState(() {
_selectedItems.add(index);
});
}
}
}, // กรณีเป็นไฟล์
)
);
}else{
return Container();
}
},
separatorBuilder: (BuildContext context, int index) => const Divider(height: 1,),
)
: const Center(child: Text('No items')), // กรณีไม่มีรายการ
),
],
),
);
}
}
แนวทางนี้สามารถนำไปปรับประยุกต์เพิ่มเติมตามต้องการได้ หวังว่าจะมีประโยชน์ไม่มากก็น้อย
เนื้อหาตอนหน้าจะเป็นอะไร รอติดตาม
 อ่านต่อที่บทความ
 เนื้อหาที่เกี่ยวข้อง