
จากที่ได้เกริ่นไปแล้วในตอนท้ายของเนื้อหาแรกเกี่ยวกับ การใช้งาน HttpClient ว่าในตอนที่ 2 นี้เรา
จะมา workshop หรือประยุกต์การใช้งาน HttpClient คั่นเวลากันก่อน เพราะเนื้อหาเกี่ยวกับการใช้งาน
การรับส่งข้อมูลระหว่าง app กับ backend service หรือ api ยังมีอีกพอสมควร ทบทวนเนื้อหาตอนที่
แล้วได้ที่บทความ
การใช้งาน HttpClient ติดต่อกับ backend service ใน Angular ตอนที่ 1 https://www.ninenik.com/content.php?arti_id=852
https://www.ninenik.com/content.php?arti_id=852 via @ninenik
โดยในเนื้อหานี้เราจะใช้ข้อมูลจาก fake api หรือ api สมมติสำหรับนักพัฒนาจากเว็บไซต์
เราจะใช้ข้อมูลเกี่ยวกับ posts ผ่าน https://jsonplaceholder.typicode.com/posts เป็นข้อมูล
บทความหลอก มีทั้งหมด 100 รายการ
นอกจากนั้น ในเนื้อหานี้เราจะได้ทบทวนการใช้งานต่างๆ เกี่ยวกับ routing การใช้งาน pipe operator
การใช้งาน template variable การส่งข้อมูลผ่าน url แบบ route parameter และ query parameter
และอื่นๆ ซึ่งเป็นเนื้อหาเกี่ยวกับการใช้งาน Angular ดังนั้น การจะเข้าใจหรือนำ Angular ไปประยุกต์ใช้งาน
ได้อย่างมีประสิทธิภาพ เราจำเป็นจะต้องรู้พื้นฐานการใช้งานพอสมควร และควรมีการทบทวนการใช้งานบ่อยๆ
เพื่อให้สามารถประยุกต์ได้ทันที
ใน workshop เราจะใช้ bootstrap v. 4.0.0-beta.2 แบบ CDN มาใช้งาน ให้กำหนดโค้ดนี้ไปในไฟล์ styles.css
@import url('https://maxcdn.bootstrapcdn.com/bootstrap/4.0.0-beta.2/css/bootstrap.min.css');
ต่อด้วยกำหนดไฟล์ app.component.html ดังนี้
ไฟล์ app.component.html
<nav class="navbar navbar-expand-sm navbar-light bg-light">
    <a class="navbar-brand" [routerLink]="['/home']">Angular</a>
    <div class="collapse navbar-collapse" id="navbarSupportedContent">
      <ul class="navbar-nav mr-auto">
        <li class="nav-item active">
          <a class="nav-link" [routerLink]="['/home']">Home <span class="sr-only">
            (current)
          </span></a>
        </li>
        <li class="nav-item">
          <a class="nav-link"  [routerLink]="['/article']">Article</a>
        </li>
      </ul>
    </div>
  </nav>

  <div class="container">
    <router-outlet></router-outlet>
  </div>
การกำหนดลิ้งค์ข้างบน จะมีส่วนของ home และ article เนื้อหาการดึงข้อมูลเราจะใช้ article path โดย
ใน home เราจะสร้างแค่ component เพื่อกำหนด path เท่านั้น ส่วน article เราจะสร้างเป็น module ย่อย
มี module , routing module และ component อีก 3 component ชื่อ article.component , article-list.component
และ article-detail.component
ให้สร้างไฟล์ที่เกี่ยวข้างทั้งหมดผ่าน angular cli ด้วยคำสั่งดังนี้ ตามลำดับ
หมายเหตุ: workshop จะทำไว้ในโฟลเดอร์ httpclient ดังนั้นให้เปลี่ยนค่านี้เป็นชื่อโฟลเดอร์ projects ของแต่ละคน
C:\projects\httpclient>ng g c home
C:\projects\httpclient>ng g module article --routing
C:\projects\httpclient>ng g c article/article --flat
C:\projects\httpclient>ng g c article/article-list --flat
C:\projects\httpclient>ng g c article/article-detail --flat
ให้สร้าง pagenofound component ไว้สำหรับกับหนดไปยังหน้า ที่ไม่ข้อมูลหรือการกำหนด path ไว้
C:\projects\httpclient>ng g c pagenofound
จากนั้นให้สร้าง article route เพื่อกำหนดการเรียก path ต่างๆ ของ article ในไฟล์ article-routing.module.ts ดังนี้
ไฟล์ article-routing.module.ts
import { NgModule } from '@angular/core';
import { Routes, RouterModule } from '@angular/router';

import { ArticleComponent } from './article.component';
import { ArticleListComponent } from './article-list.component';
import { ArticleDetailComponent } from './article-detail.component';

const articleRoutes: Routes = [
  {
    path:'article',
    component:ArticleComponent,
    children:[
      {
        path:'',
        component:ArticleListComponent
      },
      {
        path:':id',
        component:ArticleDetailComponent
      }
    ]
  }
];

@NgModule({
  imports: [RouterModule.forChild(articleRoutes)],
  exports: [RouterModule]
})
export class ArticleRoutingModule { }
ตรวจสอบด้วยว่ามีการ import ArticleRoutingModule ไปใช้งานใน ArticleModule แล้วหรือไม่
ปกติถ้าใช้งาน angular cli generate ก็จะมีการเพิ่มให้อัตโนมัติ ถ้ายังไม่มีให้ไปทำการเพิ่มก่อน
ต่อไปกำหนด routes ให้กับ app ของเรา ในไฟล์ app-routing.module.ts ดังนี้
ไฟล์ app-routing.module.ts
import { NgModule } from '@angular/core';
import { RouterModule, Routes } from '@angular/router';

import { PagenofoundComponent } from './pagenofound/pagenofound.component';
import { HomeComponent } from './home/home.component';

const appRoutes: Routes = [
    {
        path:'home',
        component:HomeComponent
    },
    {
        path: '',
        redirectTo: '/home',
        pathMatch: 'full'
    },
    { path: '**', component: PagenofoundComponent }
];

@NgModule({
  imports: [
    RouterModule.forRoot(
      appRoutes,
      { enableTracing: false } // <-- debugging purposes only set true
    )
  ],
  exports: [
    RouterModule
  ]
})
export class AppRoutingModule { }
ใน appRoutes เราจะกำหนดแค่ส่่วนของ home และ pagenofound เท่านั้น เพราะส่วนของ articleRoutes เรา
แยกไปอีก module แล้วเราจะ import เข้าไปในไฟล์ app.module.ts แทนดังนี้
ไฟล์ app.module.ts
import { BrowserModule } from '@angular/platform-browser';
import { NgModule } from '@angular/core';
import { RouterModule, Routes } from '@angular/router';
import { HttpClientModule } from '@angular/common/http';

import { AppRoutingModule } from './app-routing.module';
import { ArticleModule } from './article/article.module';

import { AppComponent } from './app.component';
import { PagenofoundComponent } from './pagenofound/pagenofound.component';
import { HomeComponent } from './home/home.component';

@NgModule({
  declarations: [
    AppComponent,
    PagenofoundComponent,
    HomeComponent
  ],
  imports: [
    BrowserModule,
    HttpClientModule,
    ArticleModule,
    AppRoutingModule
  ],
  providers: [],
  bootstrap: [AppComponent]
})
export class AppModule { }
อย่าลืมว่าเรามีการใช้งาน HttpClientModule ต้อง import เข้ามาด้วย
ต่อไปให้เพิ่ม router-outlet directive ในไฟล์ article.component.html เพื่อให้แสดง article-list และ
article-detail component ในส่วนนี้
ไฟล์ article.component.html
<p>  article works!</p>
<router-outlet></router-outlet>
ทดสอบผลลัพธ์ การเตรียมพร้อมการใช้งาน ได้ที่ demo 1 ท้ายบทความ
ต่อไปเราจะไปกำหนดรูปแบบหน้าตาของหน้า article-list ที่เราอยากได้ ตามรูปแบบ html เบื้องต้นและ
ผลลัพธ์ตามรูปด้านล่าง
ไฟล์ article-list.component.html โครงสร้างการแสดงข้อมูล
<p> article-list works! </p>
<table class="table table-sm">
  <thead class="thead-dark">
    <tr>
      <th scope="col">#</th>
      <th scope="col">Title</th>
    </tr>
  </thead>
  <tbody>
    <tr>
      <th scope="row">1</th>
      <td><a class="text-secondary">test 1</a></td>
    </tr>
    <tr>
      <th scope="row">2</th>
      <td><a class="text-secondary">test 2</a></td>
    </tr>
    <tr>
      <th scope="row">3</th>
      <td><a class="text-secondary">test 3</a></td>
    </tr>
    <tr>
      <th scope="row">4</th>
      <td><a class="text-secondary">test 4</a></td>
    </tr>
    <tr>
      <th scope="row">5</th>
      <td><a class="text-secondary">test 5</a></td>
    </tr>
  </tbody>
</table>
<nav aria-label="Page navigation">
  <ul class="pagination">
    <li class="page-item"> <a class="page-link"> First</a> </li>
    <li class="page-item disabled"> <a class="page-link"> Previous</a> </li>
    <li class="page-item active"><a class="page-link">1</a></li>
    <li class="page-item"><a class="page-link">2</a></li>
    <li class="page-item"><a class="page-link">3</a></li>
    <li class="page-item"><a class="page-link">4</a></li>
    <li class="page-item"><a class="page-link">5</a></li>
    <li class="page-item"> <a class="page-link" > Next</a> </li>
    <li class="page-item">
      <input type="number"class="form-control" min="1" max="5"
          style="width:80px;"  value="1" />
    </li>
    <li class="page-item"> <a class="page-link"> Last</a> </li>
  </ul>
</nav>
ผลลัพธ์การแสดงผลเบื้องต้น แสดงดังรูป
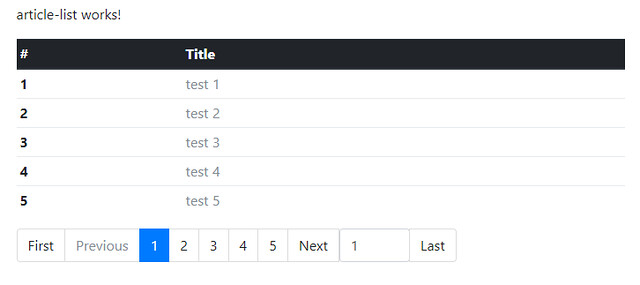
จากรูปแบบข้างต้น เราใช้คุณสมบัติของ bootstrap ที่มี component pagination สำหรับสร้าง css แสดงรูปแบบ
การแบ่งหน้าไว้ให้แล้ว จะมี css class disabled ใช้ในการไม่อนุญาตให้คลิกที่ปุ่มนั้น เช่นปุ่ม previous ถ้าอยู่หน้า 1
ปุ่ม previous ก็จะกดไม่ได้ และก็มี css class active ใช้สำหรับระบุว่าในขณะนั้นผู้ใช้อยู่ที่หน้าไหน
สำหรับสิ่งที่เราเพิ่มเข้ามาในปุ่มแบ่งหน้าคือ มีปุ่ม First ไปหน้าแรก และปุ่ม Last ไปหน้าสุดท้าย และเรายังมี input
สำหรับเลือกเปลียนไปหน้าต่างๆ ได้โดยง่าย
นี้คือส่วนของปุ่มแบ่งหน้าที่เรา มีการกำหนดตัวแปรต่างๆ รวมถึงการแสดงผลตามเงื่อนที่ต้องการ จะขออธิบายไป
แต่ละส่วน
<nav aria-label="Page navigation">
  <ul class="pagination">
    <li class="page-item">
    	<a class="page-link" [routerLink]="['/article']"  [queryParams]="{page: 1}"> First</a>
    </li>
    <li class="page-item" [class.disabled]="activePage==1">
    	<a class="page-link" [routerLink]="['/article']"  [queryParams]="{page: prevPage}"> Previous</a>
    </li>
    <li class="page-item" *ngFor="let i of iPage" [class.active]="activePage==i">
    	<a class="page-link" [routerLink]="['/article']"  [queryParams]="{page: i}"> {{ i }} </a>
    </li>
    <li class="page-item" [class.disabled]="activePage==totalPage">
        <a class="page-link" [routerLink]="['/article']"
                [queryParams]="{page: nextPage}"> Next</a>
	</li>
    <li class="page-item">
      <input #pageInput type="number"class="form-control" min="1" max="{{ totalPage }}"
              style="width:80px;" (input)="changePage(pageInput.value)" value="{{ activePage }}" />
    </li>
    <li class="page-item">
    	<a class="page-link" [routerLink]="['/article']"  [queryParams]="{page: totalPage}"> Last</a>
    </li>
  </ul>
</nav>
ค่าตัวแปรต่างๆ ที่เราจะใช้ในการกำหนดการสร้างปุ่มแบ่งหน้า
- totalPage คือ จำนวนหน้าทั้งหมด
- activePage คือ เลขหน้าปัจจุบัน
- nextPage คือ เลขหน้าถัดไป
- prevPage คือ เลขหน้าก่อนหน้า
- iPage คือ ตัวแปร array เลขหน้า เช่น [1,2,3,4,5] เอาไว้สร้างเลขหน้า
- changePage() คือ ฟังก์ชั่นหรือคำสั่งสำหรับการเปลี่ยนหน้า page
ค่าต่างๆ เหล่านี้จะอยู่ในส่วนของ class component ที่เราต้องกำหนดเงื่อนไขการทำงานต่างๆ
ในโค้ดข้างต้น เราเห็นการใช้งานรูปแบบการกำหนด query parameter ผ่าน [queryParams] directive
เช่นปุ่ม First
[queryParams]="{page: 1}"
เมื่อเราคลิก ก็จะมีการส่งค่า ?page=1 ไปใน url ก็จะเป็น /article?page=1 เป็นต้น เราเคยใช้งานการกำหนด query
parameter ไปบ้างแล้วในการใช้งาน routing ซึ่งในคราวนั้นเป็นการกำหนดผ่านการใช้งานคำสั่ง navigator()
นอกจากนี้เรายังมีการใช้งานการเชื่อมโยงข้อมูล data binding แบบ Class binding
หมายเหตุ:ทบทวนได้ที่บทความ https://www.ninenik.com/content.php?arti_id=787
[class.disabled]="activePage==1"
อย่างปุ่ม previous ถ้าหน้าปัจจุบันเป็นหน้า 1 ก็ให้ css class ชื่อ disabled ใช้งานกับปุ่มนั้น ทำให้ปุมนั้นไม่สามารถ
ทำงานเมื่อมีการคลิก เช่นเดียวกับรุปแบบ
[class.active]="activePage==i"
ถ้าหน้าปัจจุบันตรงกับปุ่มเลขหน้าไหน ก็ให้ปุ่มเลขหน้านั้นมี css class ชื่อ active ถูกใช้งาน
เรามีการใช้งาน Event Binding หรือการเชื่อมโยงข้อมูลด้วย Event ที่ชื่อ input โดยทั่วไปเราจะคุ้นกับ change มากกว่า
แต่เนื่องจากใน html5 สำหรับ input type=number จะมี input event เพิ่มเข้ามา เมื่อมีการเปลี่ยนแปลงค่า หรือมีการ
พิมพ์ค่าเข้าไป ก็จะเกิด event นี้ขึ้น
(input)="changePage(pageInput.value)"
การทำงานคือ เมื่อมีการเปลี่ยนแปลงเลขหน้าผ่าน input type=number ก็ให้เรียกฟังก์ชั่น changePage() เข้ามาทำงาน
ในฟังก์ชั่นนี้ เราจะเห็นว่ามีการส่งค่าตัวแปร pageInput เข้าไปด้วย ตัวแปร pageInput นี้คือรูปแบบการใช้งานจาก
template variable ด้วยการกำหนด # ไปด้านหน้า สังเกตส่วนของโค้ดด้านล่าง
<input #pageInput type="number"class="form-control" min="1" max="{{ totalPage }}"
              style="width:80px;" (input)="changePage(pageInput.value)" value="{{ activePage }}" />
ตัวแปร #pageInput คือรูปแบบการใช้งาน template variable หากจำไม่ได้สามารถกลับไปทบทวนการใช้งานได้
ตัวแปร pageInput ก็จะอ้างอิงค่าของ input type=number แล้วส่งค่านี้ไปใช้งานในตอนที่มีการเรียกใช้
ฟังก์ชั่น changePage(pageInput.value)
สำหรับการสร้างปุ่มเลขหน้านั้น เราจะใช้คำสั่ง ngFor วนลูปแสดงข้อมูล array ของตัวแปร iPage
*ngFor="let i of iPage"
โดยในที่นี้เราจะฟิกค่าจำนวนไว้ไม่ให้เกิน 5 รายการ โดยเมื่อถ้าเป็นหน้าที่ 6 ก็จะมีการสร้างปุ่มใหม่ เริ่มต้นที่เลข 4
หรือเลขหน้าขณะนั้น ลบด้วย 2 เป็นต้น
ต่อไปเรามาลองกำหนดในส่วนของคำสั่งการทำงานการจัดการเลขหน้ากันก่อน ในไฟล์ article-list.component.ts ดังนี้
ไฟล์ article-list.component.ts
import { Component, OnInit } from '@angular/core';
import { Router, ActivatedRoute, ParamMap } from '@angular/router';
import { HttpClient, HttpErrorResponse, HttpResponse } from '@angular/common/http';
import { Observable } from 'rxjs/Observable';

@Component({
  //selector: 'app-article-list',
  templateUrl: './article-list.component.html',
  styleUrls: ['./article-list.component.css']
})
export class ArticleListComponent implements OnInit {

  // ส่วนจัดการเกี่ยวกับการแบ่งหน้า variable
  public iPage:number[] = [];
  public iPageStart:number = 1;
  public prevPage:number;
  public nextPage:number;
  public activePage:number;
  public totalItem:number = 100; // สมมติจำนวนรายการทั้งหมดเริ่มต้น หรือเป็น 0 ก็ได้
  public perPage:number = 10; // จำนวนรายการที่แสดงต่อหน้า
  public totalPage:number;
  public maxShowPage:number;
  public useShowPage:number = 5; // จำนวนปุ่มที่แสดง ใช้แค่ 5 ปุ่มตัวเลข
  public pointStart:number = 0; // ค่าส่วนนี้ใช้การกำหนดการแสดงข้อมูล
  public pointEnd:number; // ค่าส่วนนี้ใช้การกำหนดการแสดงข้อมูล

  constructor(
    private http:HttpClient,
    private route: ActivatedRoute,
    private router:Router
  ) { }

  // ส่วนจัดการเกี่ยวกับการแบ่งหน้า
  changePage(page:number){
    this.activePage = page;
    this.router.navigate(['/article'], {queryParams:{page:page}});
  }

  pagination(){
    if(this.activePage > this.useShowPage){
      if(this.activePage+2 <= this.totalPage){
        this.iPageStart = this.activePage-2;
        this.maxShowPage = this.activePage+2;
      }else{
        if(this.activePage <= this.totalPage){
          this.iPageStart = (this.totalPage+1)-this.useShowPage;
          this.maxShowPage = (this.iPageStart-1)+this.useShowPage;
        }
      }
      this.iPage = [];
      for(let i=this.iPageStart;i<=this.maxShowPage;i++){
        this.iPage.push(i);
      }
    }else{
      this.iPageStart = 1;
      this.iPage = [];
      for(let i=this.iPageStart;i<=this.useShowPage;i++){
        this.iPage.push(i);
      }
    }

  }
  // ส่วนจัดการเกี่ยวกับการแบ่งหน้า

  ngOnInit() {

    // ส่วนจัดการเกี่ยวกับการแบ่งหน้า
    this.activePage = 1;
    this.nextPage = 2;
    this.pointEnd = this.perPage*this.activePage;

    this.totalPage = Math.ceil(this.totalItem/this.perPage);
    if(this.totalPage>this.useShowPage){
      this.useShowPage = 5;
    }else{
      this.useShowPage = this.totalPage;
    }

    for(let i=this.iPageStart;i<=this.useShowPage;i++){
      this.iPage.push(i);
    }

    this.route
    .queryParams
    .subscribe((data: { page: any }) => {
      if(data!=null && data.page!=null){
        this.activePage = +data.page;
        this.prevPage = this.activePage-1;
        this.nextPage = this.activePage+1;
        this.pointStart = (this.activePage-1)*this.perPage;
        this.pointEnd = this.perPage*this.activePage;
        this.pagination();
      }
    });
    // ส่วนจัดการเกี่ยวกับการแบ่งหน้า

  }

}
จะไม่อธิบายโดยละเอียดในส่วนของโค้ดการแบ่งหน้า สามารถไล่ดูและทำความเข้าใจได้ด้วยตัวเอง
เราสมมติจำนวนรายการในการกำหนดการแบ่งหน้า 100 รายการ แบ่งหน้าละ 10 รายการ ก็จะได้ทั้งหมด
10 หน้า ให้ดูตัวอย่างผลลัพธ์การทำงานได้ที่ demo 2 หรือ คลิกที่ลิ้งค์ด้านล่าง เพื่อดู url เกี่ยวกับการส่ง
ค่า query parameter
ตอนนี้ส่วนของการแบ่งหน้าเราพร้อมทำงานแล้ว ต่อไปเราจะปรับในส่วนของการดึงข้อมูล มาแสดงโดยแสดง
ข้อมูลตามเงื่อนไขการแบ่งหน้า เช่น ถ้ามี 100 รายการ แสดงหน้าละ 10 รายการ รายการหน้าแรกก็จะแสดงราย
การที่ 1-10 หน้า 2 ก็ 11-20 .. แบบนี้ไปเรื่อยๆ
ปรับไฟล์ ไฟล์ article-list.component.ts โดยเพิ่มส่วนของการดึงข้อมูลเป็นดังนี้
ไฟล์ article-list.component.ts
import { Component, OnInit } from '@angular/core';
import { Router, ActivatedRoute, ParamMap } from '@angular/router';
import { HttpClient, HttpErrorResponse, HttpResponse } from '@angular/common/http';
import { Observable } from 'rxjs/Observable';

// กำหนด interface ให้สอดคล้องกับข้อมูลที่ส่งมา
interface Articles{
  'userId':number,
  'id':number,
  'title':string,
  'body':string
}

@Component({
  //selector: 'app-article-list',
  templateUrl: './article-list.component.html',
  styleUrls: ['./article-list.component.css']
})
export class ArticleListComponent implements OnInit {
  // ส่วนของตัวแปรไว้รับค่าข้อมูลที่ไปดึงมา
  public results:any;// กำหนดตัวแปร เพื่อรับค่า
  public urlSource:string = "https://jsonplaceholder.typicode.com";
  public highlightId:number; // สำหรับเก็บ id ที่เพิ่งเข้าดู

  // ส่วนจัดการเกี่ยวกับการแบ่งหน้า variable
  public iPage:number[] = [];
  public iPageStart:number = 1;
  public prevPage:number;
  public nextPage:number;
  public activePage:number;
  public totalItem:number = 100; // สมมติจำนวนรายการทั้งหมดเริ่มต้น หรือเป็น 0 ก็ได้
  public perPage:number = 10; // จำนวนรายการที่แสดงต่อหน้า
  public totalPage:number;
  public maxShowPage:number;
  public useShowPage:number = 5; // จำนวนปุ่มที่แสดง ใช้แค่ 5 ปุ่มตัวเลข
  public pointStart:number = 0; // ค่าส่วนนี้ใช้การกำหนดการแสดงข้อมูล
  public pointEnd:number; // ค่าส่วนนี้ใช้การกำหนดการแสดงข้อมูล

  constructor(
    private http:HttpClient,
    private route: ActivatedRoute,
    private router:Router
  ) { }

  // ส่วนจัดการเกี่ยวกับการแบ่งหน้า
  changePage(page:number){
    this.activePage = page;
    this.router.navigate(['/article'], {queryParams:{page:page}});
  }

  pagination(){
    if(this.activePage > this.useShowPage){
      if(this.activePage+2 <= this.totalPage){
        this.iPageStart = this.activePage-2;
        this.maxShowPage = this.activePage+2;
      }else{
        if(this.activePage <= this.totalPage){
          this.iPageStart = (this.totalPage+1)-this.useShowPage;
          this.maxShowPage = (this.iPageStart-1)+this.useShowPage;
        }
      }
      this.iPage = [];
      for(let i=this.iPageStart;i<=this.maxShowPage;i++){
        this.iPage.push(i);
      }
    }else{
      this.iPageStart = 1;
      this.iPage = [];
      for(let i=this.iPageStart;i<=this.useShowPage;i++){
        this.iPage.push(i);
      }
    }

  }
  // ส่วนจัดการเกี่ยวกับการแบ่งหน้า

  ngOnInit() {

    // ส่วนจัดการเกี่ยวกับการแบ่งหน้า
    this.activePage = 1;
    this.nextPage = 2;
    this.pointEnd = this.perPage*this.activePage;

    this.totalPage = Math.ceil(this.totalItem/this.perPage);
    if(this.totalPage>this.useShowPage){
      this.useShowPage = 5;
    }else{
      this.useShowPage = this.totalPage;
    }

    for(let i=this.iPageStart;i<=this.useShowPage;i++){
      this.iPage.push(i);
    }

    this.route
    .queryParams
    .subscribe((data: { page: any }) => {
      if(data!=null && data.page!=null){
        this.activePage = +data.page;
        this.prevPage = this.activePage-1;
        this.nextPage = this.activePage+1;
        this.pointStart = (this.activePage-1)*this.perPage;
        this.pointEnd = this.perPage*this.activePage;
        this.pagination();
      }
    });
    // ส่วนจัดการเกี่ยวกับการแบ่งหน้า

    // ส่วนของการดึงข้อมูลด้วย HttpClient get() method
    this.http.get<Articles[]>(this.urlSource+'/posts')
    .subscribe(
      data => {
        // กรณี resuponse success
        // เก็บจำนวนรายการทั้งหมด ไปคำนวณหน้าจำนวนหน้า
        this.totalItem = data.length;
        this.results = data;
      },
      ( err:HttpErrorResponse ) => {
        // กรณี error
        if (err.error instanceof Error) {
          // กรณี error ฝั่งผู้ใช้งาน หรือ การเชื่อมต่อเกิด error ขึ้น
          console.log('An error occurred:', err.error.message);
        }else{ // กรณี error ฝั่ง server ไม่พบไฟล์ ,server error
          console.log(`Backend returned code ${err.status}, body was: ${err.error}`);
        }
      }
    );

    // ส่วนของการรับค่า paramMap ที่ส่งกลับมาจากหน้า รายละเอียด
    let params = this.route.snapshot.paramMap;
    if(params.has('id')){
      // เก็บ id รายการที่เพิ่งเข้าไปดู ใส่เครื่องหมาย + ด้านหน้าเพื่อทำให็
      // string แปลงเป็นตัวแปร number
      this.highlightId = +params.get('id');
    }


  }

}
เราทราบ url ของ fake api หรือข้อมูลจำลองที่เราจะดึงมาแล้ว ก็คือ https://jsonplaceholder.typicode.com/posts
ซึ่งโครงสร้างของข้อมูลจะเป็น array ของ object ในรูปแบบ
{
	"userId": 1,
	"id": 1,
	"title": "text",
	"body": "text"
}
เราจึงควรกำหนดรูปแบบหน้าตาของข้อมูลที่จะได้รับมาด้วยการใช้งาน interface ในบรรทัดที่ 7 - 12
// กำหนด interface ให้สอดคล้องกับข้อมูลที่ส่งมา
interface Articles{
  'userId':number,
  'id':number,
  'title':string,
  'body':string
}
ในส่วนของบรรทัดที่ 21 - 23 เป็นการกำหนดตัวแปรสำหรับรับค่าข้อมูลที่ส่งกลับมา และ url ของข้อมูล json data
ที่เป็น fake api นอกจากนั้นในที่นี้เรามีการกำหนดตัวแปร highlightId สำหรับเป็นตัวเก็บ id ของรายการที่เราเพิ่งเข้า
ไปดูล่าสุด โดยค่านี้เราจะใช้สำหรับทำ highlight รายการที่เพิ่งเข้าดู
// ส่วนของตัวแปรไว้รับค่าข้อมูลที่ไปดึงมา
public results:any;// กำหนดตัวแปร เพื่อรับค่า
public urlSource:string = "https://jsonplaceholder.typicode.com";
public highlightId:number; // สำหรับเก็บ id ที่เพิ่งเข้าดู
จากนั้นบรรทัดที่ 110 ลงไปก็เป็นส่วนที่ใช้ในการดึงข้อมูลผ่าน HttpClient ในบรรทัดที่ 110 เรากำหนดชนิดของรูปแบบ
ข้อมูลที่คืนกลับมาจากการใช้ฟังก์ชั่น get() โดยให้มีรูปแบบของ <Articles[]> หรือ array ของ interface Articles
การกำหนดส่วนนี้ จะทำให้เราสามารถระบุประเภทของตัวแปรของข้อมูลที่ถูกส่งกลับมา รวมทั้งสามารถใช้ฟังก์ชั่น
ของตัวแปรนั้นๆ ได้ อย่างในบรรทัดที่ 115
this.totalItem = data.length;
เนื่องจากเรากำหนดรูปแบบข้อมูลเป็น array เราจึงสามารถเรียกใช้ length property ได้ ถ้าไม่กำหนด <Articles[]> ให้
กับค่าที่คืนกลับมา ก็จะไม่สามารถใช้ length property ได้ เพราะไม่รู้ว่าเป็นข้อมูลประเภทไหน
เมื่อได้ข้อมูลเป็นที่เรียบร้อยแล้ว เรากลับมาทำโค้ดหน้าแสดงผลให้แล้วเสร็จ โดยปรับไฟล์ article-list.component.html
ในส่วนของการแสดงรายการ ดังนี้
ไฟล์ article-list.component.html
<p>article-list works!</p>
<table class="table table-sm">
    <thead class="thead-dark">
      <tr>
        <th scope="col">#</th>
        <th scope="col">Title</th>
      </tr>
    </thead>
    <tbody>
      <tr [class.table-info]="highlightId == result.id"
       *ngFor="let result of results | slice:pointStart:pointEnd;let i=index">
        <th scope="row">{{ ((activePage-1)*perPage) + (i+1) }}</th>
        <td>
          <a class="text-secondary" [routerLink]="['/article',result.id]"
          [queryParams]="{page: activePage}" >
          {{ result.title }}
          </a>
        </td>
      </tr>
    </tbody>
  </table>
  <nav aria-label="Page navigation">
      <ul class="pagination">
        <li class="page-item">
          <a class="page-link" [routerLink]="['/article']"  [queryParams]="{page: 1}"> First</a>
        </li>
        <li class="page-item" [class.disabled]="activePage==1">
          <a class="page-link" [routerLink]="['/article']"  [queryParams]="{page: prevPage}"> Previous</a>
        </li>
        <li class="page-item" *ngFor="let i of iPage" [class.active]="activePage==i">
          <a class="page-link" [routerLink]="['/article']"  [queryParams]="{page: i}"> {{ i }} </a>
        </li>
        <li class="page-item" [class.disabled]="activePage==totalPage">
            <a class="page-link" [routerLink]="['/article']"
                    [queryParams]="{page: nextPage}"> Next</a>
      </li>
        <li class="page-item">
          <input #pageInput type="number"class="form-control" min="1" max="{{ totalPage }}"
                  style="width:80px;" (input)="changePage(pageInput.value)" value="{{ activePage }}" />
        </li>
        <li class="page-item">
          <a class="page-link" [routerLink]="['/article']"  [queryParams]="{page: totalPage}"> Last</a>
        </li>
      </ul>
    </nav>
ในบรรทัดที่ 11 12 เป็นส่วนจัดการ การวนลูปแสดงข้อมูล และการกำหนด highlight โดยใช้ class binding
[class.table-info]="highlightId == result.id"
ถ้า id ของหน้าที่เพิ่งเปิดดู ตรงกับ id ของรายการแถวไหน ให้เพิ่ม css class ชื่อ table.info ให้กับแถวนั้นๆ
ในขั้นตอนการวนลูปแสดงข้อมูลด้วย ngFor มีการใช้งาน pipe operator ชื่อว่า slice หมายถึง ให้ตัดเอารายการ
ที่ลำดับ pointStart ถึง ลำดับที่ pointEnd ซึ่งอ้างอิงจากค่าตัวแปร
โดยถ้าเป็นค่าหน้าแรก ก็จะต้องเป็น
0 กับ 10 หมายถึงดึงรายการลำดับที่ 1 ถึง 10 มาแสดง
หน้าที่ 2 ก็จะต้องเป็น
10 , 20 หมายถึงดึงรายการลำดับที่ 11 ถึง 20 มาแสดง แบบนี้เป็นต้น
การดึงข้อมูลมาทั้งหมดครั้งเดียว แล้วทำการแยกรายการเอาในลักษณะข้างต้นนี้ อาจจะเหมาะสมในบางกรณี เช่น api
ไม่มีการกำหนดรูปแบบที่ดีพอ หรือเป็นรายการข้อมูลที่มีไม่มากนัก อาจจะไม่เกิน 1000 รายการ แต่ถ้าเป็นข้อมูลที่เป็น
หลักพันหรือหมื่นรายการ ก็จะไม่เหมาะสม ซึ่งข้อมูลจำนวนมากนั้น รูปแบบ api ที่ดีสำหรับการแบ่งหน้า ก็คือ รองรับ
การส่งค่า หน้าทั้งหมด หน้าที่แสดงอยู่ รายการทั้งหมด เป็น data กลับมาด้วย และแสดงข้อมูลตามค่าที่กำหนดให้แสดงได้
เช่น เป็น api ที่สามารถเลือกดูเป็นหน้าๆ ได้ อย่างเราต้องการดูเฉพาะรายการหน้าที่ 1 ก็ส่งเฉพาะ 10 รายการกลับมา
แบบนี้เป็นต้น สามารถดูรูปแบบ api ในลักษณะดังกล่าวได้ที่ https://reqres.in/
ตัวอย่างรูปแบบ api ที่เหมาะสมกรณีมีรายการจำนวนมากๆ
{
    "page": 2,
    "per_page": 3,
    "total": 12,
    "total_pages": 4,
    "data": [
        {
            "id": 4,
            "first_name": "Eve",
            "last_name": "Holt",
            "avatar": "https://s3.amazonaws.com/uifaces/faces/twitter/marcoramires/128.jpg"
        },
        {
            "id": 5,
            "first_name": "Charles",
            "last_name": "Morris",
            "avatar": "https://s3.amazonaws.com/uifaces/faces/twitter/stephenmoon/128.jpg"
        },
        {
            "id": 6,
            "first_name": "Tracey",
            "last_name": "Ramos",
            "avatar": "https://s3.amazonaws.com/uifaces/faces/twitter/bigmancho/128.jpg"
        }
    ]
}
ตอนนี้เราจัดการท้้งหมดในหน้า article-list เรียยร้อยแล้ว ที่เหลือก็ส่วนของไฟล์แสดงรายละเอียด ให้ปรับ
โค้ดที่เหลือตามดังนี้
ไฟล์ article-detail.component.html
<p>article-detail works!</p>
<table class="table table-sm">
<thead class="thead-dark">
<tr>
<th scope="col" colspan="2">View Detail</th>
</tr>
</thead>
<tbody *ngFor="let result of results">
<tr>
<th class="table-secondary text-right" width="100" scope="row">userId </th>
<td> {{ result.userId }} </td>
</tr>
<tr>
<th class="table-secondary text-right" scope="row">ID </th>
<td> {{ result.id }} </td>
</tr>
<tr>
<th class="table-secondary text-right" scope="row">Title </th>
<td> {{ result.title }} </td>
</tr>
<tr>
<th class="table-secondary text-right" scope="row">Detail </th>
<td> {{ result.body }} </td>
</tr>
</tbody>
</table>
<button [routerLink]="['/article',{id:postID}]"
[queryParams]="{page: activePage}" class="btn btn-sm btn-warning"> Back</button>
ไฟล์ article-detail.component.ts
import { Component, OnInit } from '@angular/core';
import { Router, ActivatedRoute, ParamMap } from '@angular/router';
import { HttpClient, HttpErrorResponse, HttpResponse } from '@angular/common/http';
import { Observable } from 'rxjs/Observable';

// กำหนด interface ให้สอดคล้องกับข้อมูลที่ส่งมา
interface Articles{
  'userId':number,
  'id':number,
  'title':string,
  'body':string
}

@Component({
  // selector: 'app-article-detail',
  templateUrl: './article-detail.component.html',
  styleUrls: ['./article-detail.component.css']
})
export class ArticleDetailComponent implements OnInit {
  public results:any;
  public urlSource:string = "https://jsonplaceholder.typicode.com";
  public postID:number;
  public activePage:number;

  constructor(
    private http:HttpClient,
    private route: ActivatedRoute,
    private router: Router
  ) { }

  ngOnInit() {

    let params = this.route.snapshot.paramMap;
    if(params.has('id')){
      this.postID = +params.get('id');
    }
    this.route
    .queryParams
    .subscribe((data: { page: any }) => {
      if(data!=null && data.page!=null){
        this.activePage = +data.page;
      }
    });

    // ส่วนของการดึงข้อมูลด้วย HttpClient get() method
    this.http.get<Articles[]>(this.urlSource+'/posts')
    .subscribe(
      data => {
        // กรณี resuponse success
        this.results = data.filter( article => {
          return article.id == this.postID;
        });
      },
      ( err:HttpErrorResponse ) => {
        // กรณี error
        if (err.error instanceof Error) {
          // กรณี error ฝั่งผู้ใช้งาน หรือ การเชื่อมต่อเกิด error ขึ้น
          console.log('An error occurred:', err.error.message);
        }else{ // กรณี error ฝั่ง server ไม่พบไฟล์ ,server error
          console.log(`Backend returned code ${err.status}, body was: ${err.error}`);
        }
      }
    );

  }

}
นอกจากข้อมูลจาก fake api หรือ api สำหรับทดสอบเรามีการส่งค่ามาแบบครั้งเดียวหลายๆ ค่าในรูปแบบ array
ในการแสดงข้อมูล จึงใช้ ngFor วนลูปแสดงรายการ ถึงแม่จะมีแค่รายการเดียว เราสามารถแปลงเป็น object ข้อมูล
เดียวแล้วใช้ ngIf แสดงก็ทำได้เหมือนกัน ในที่นี้จะขอใช้แบบง่ายไม่ให้เนื้อหายาวจนเกินไป
ในหน้า article-detail นั้นจะรับค่า id ของข้อมูลที่จะแสดง และ หน้า page ของข้อมูลที่เปิด เพื่อไว้อ้างอิงตอนกด
ปุ่ม back ให้กลับไปยังหน้าเดิม ไม่ใช่หน้าเริ่มต้น
ทำความเข้าใจก่อนสับสนระหว่างค่าต่างๆ ระหว่าง route parameter , query parameter หรือ queryParams และ
paramMap
http://localhost:4200/article/32?page=4
url ข้างต้นมี route paremeter เท่ากับ 32 อ้างอิงผ่านค่า id ที่เรากำหนดใน route path
page=4 คือ key และ value ของ queryParams จำไว้ว่า queryParams จะมีโครงหมาย ? และ/หรือ & ด้วย
http://localhost:4200/article;id=32?page=4
เมื่อกดปุ่ม back กลับมา จะเห็นว่ามีการ มีค่า paramMap ส่งกลับมา ตรง ;id=32
โดยค่า paramMap นั้นจะมี ; ข้างหน้า คั่นระหว่างแต่ละค่า ถ้าส่งมาหลายอัน เช่น
http://localhost:4200/article;id=33;more=test?page=4
ค่านี้ไม่ไช่ค่า route parameter เหมือน url ก่อนหน้า
เราไปดูผลลัพธ์สุดท้ายได้ที่ demo 3
เมื่อมีการเชื่อมต่อหรือดึงข้อมูลจาก api เราจะเห็นได้ชัดจากการโหลดข้อมูล ที่อาจจะช้าหรือเร็วขึ้นกับปัจจัย
หลายอย่าง อย่างในโค้ดตัวอย่าง เนื่องจากเป็นการดึงข้อมูลครั้งเดียวแบบจำนวนมาก ถ้าเปิดมาครังแรกจะโหลดข้อมูล
ทุกครั้งที่เข้ามายัง route /article แต่ถ้าเปลี่ยนไปหน้า page ต่างๆ ใน /article path จะเร็ว เพราะใช้ข้อมูลที่ได้มาแล้ว
แต่เมื่อกดไปหน้ารายละเอียด เช่น /article/1 ก็จะเป็นการโหลดข้อมูลใหม่อีกครั้ง เมื่อคลิกย้อนกลับมาหน้า /article
ก็โหลดข้อมูลใหม่อีกครั้ง เลยทำให้การแสดงข้อมูล ดูช้า การเพิ่มลูกเล่น กรณีรอข้อมูลโหลดเสร็จแล้วค่อยแสดง
หรือการ cache ข้อมูล หรือการจัดการที่ฝั่ง api ให้มีรูปแบบการใช้งาน api ที่มีประสิทธิภาพเพื่มขึ้น ก็อาจจะจำเป็นต้อง
นำมาใช้ในอณาคต
เนื้อหาตอนหน้าเราจะกลับมาดูในเรื่องของการใช้งาน HttpClient กันต่อเกี่ยวกับการส่งข้อมูล รอติดตาม
 อ่านต่อที่บทความ
 เนื้อหาที่เกี่ยวข้อง